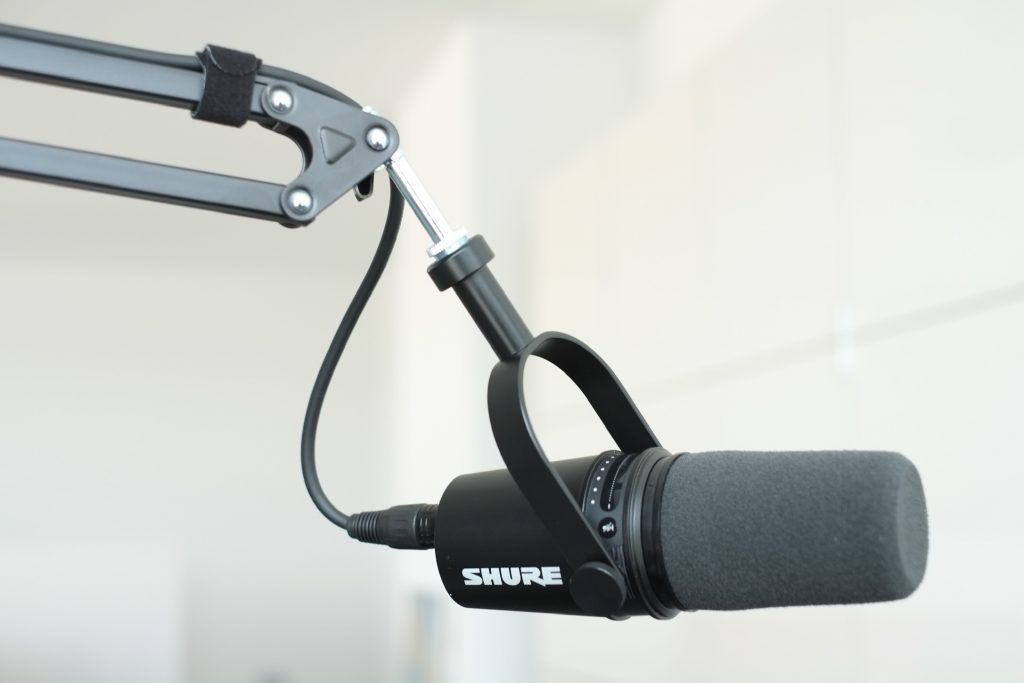

Das ikonische Design des Shure SM7B ist in beinahe jedem Video-Podcast zu sehen und ich halte das nicht für die beste Wahl. Im Kern ist das SM7B ein direkter Nachfolger des SM57 und des SM58. Alle drei sind dynamische Mikrofone und verwenden die gleiche Kapsel. Das SM57 wird vor allem für die Mikrofonierung von Musikinstrumenten eingesetzt und das SM58 ist ein ikonisches Stage Mike, mit dem man zur Not auch mal einen Nagel einschlagen kann. Wenn man ein einziges Mikro für das ganze Leben kaufen will, dann nimmt man das Shure SM58.
Das SM7B, wie seine Vorgänger SM7 und SM7A, erweitert dieses Mikro um ein massives Metallgehäuse, das gegen hochfrequente Störquellen und gegen Körperschall abschirmt. Statt eines Drahtkäfigs mit dünner Schaumstoffeinlage erhielt es einen voluminösen Käfig und einen dicken Windschutz, der gegen Popp- und Zischlaute schützt.
Nimmt man diesen Schutz ab, dann sieht man den Aufbau des Mikrofons besser. Die eigentliche Mikrofonkapsel sitzt am rechten Ende des silbrigen Zylinders in diesem Käfig. Davor ist jede Menge Abstand bis zum Ende dieses Schutzes:
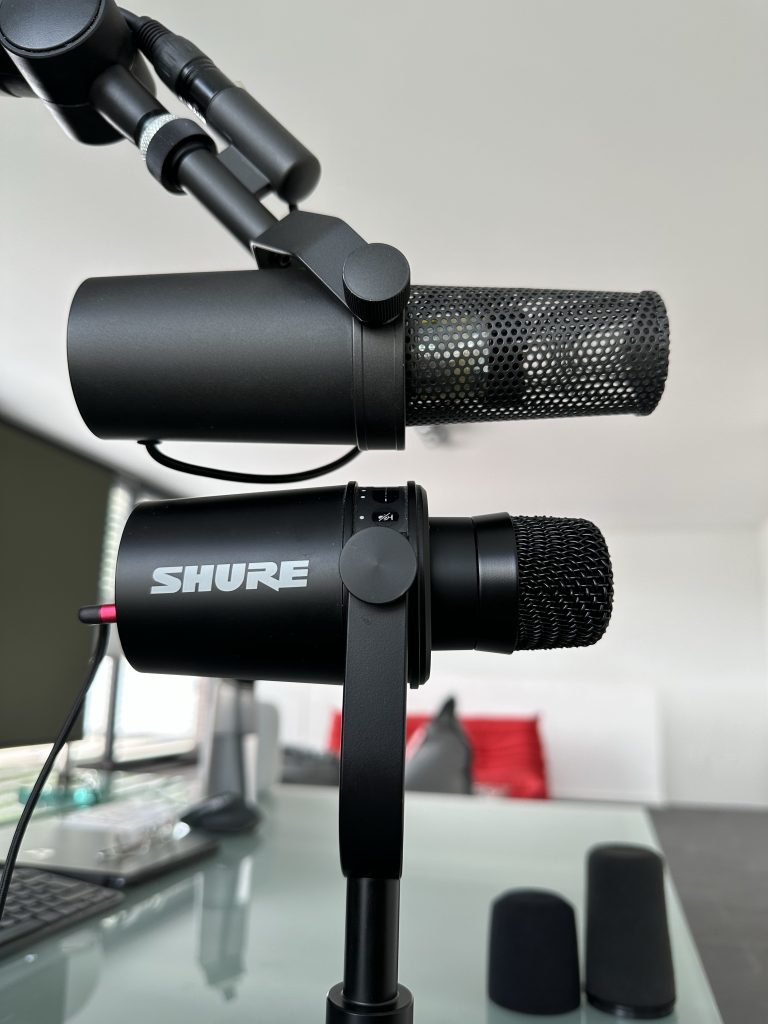
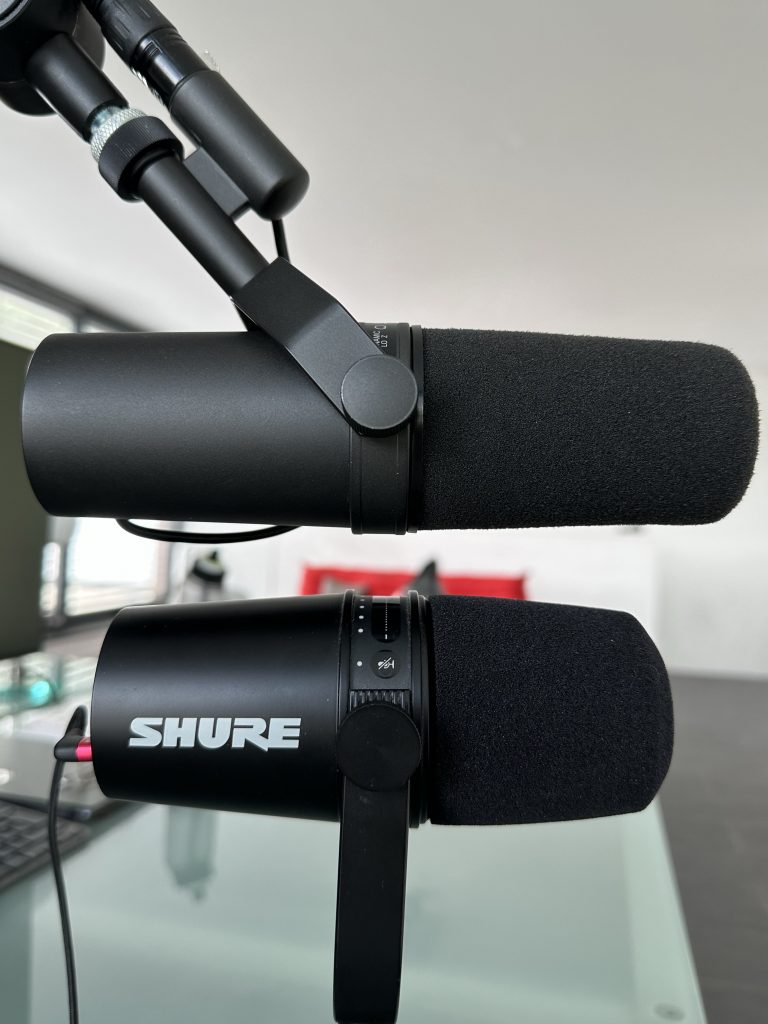
Das MV7 ist dagegen ähnlich dem SM58 aufgebaut. Dort gibt es einen engmaschigen Drahtkäfig zum Schutz der Kapsel. Diese Kapsel wir von einem sehr billig wirkenden Schaumstoff-Windschutz umfasst. Ich habe dieser Konstruktion ein einfaches Upgrade verpasst:
Der Windschutz hat einen sehr großen Einfluss auf den Klang. Bei mir sorgt er vor allem dafür, dass ich nicht zu nahe mit dem Mund an die Kapsel gehe. Beim SM7B rastet der Windschutz ein, beim MV7 steckt er nur lose drauf, hält aber für meinen Einsatz gut genug.
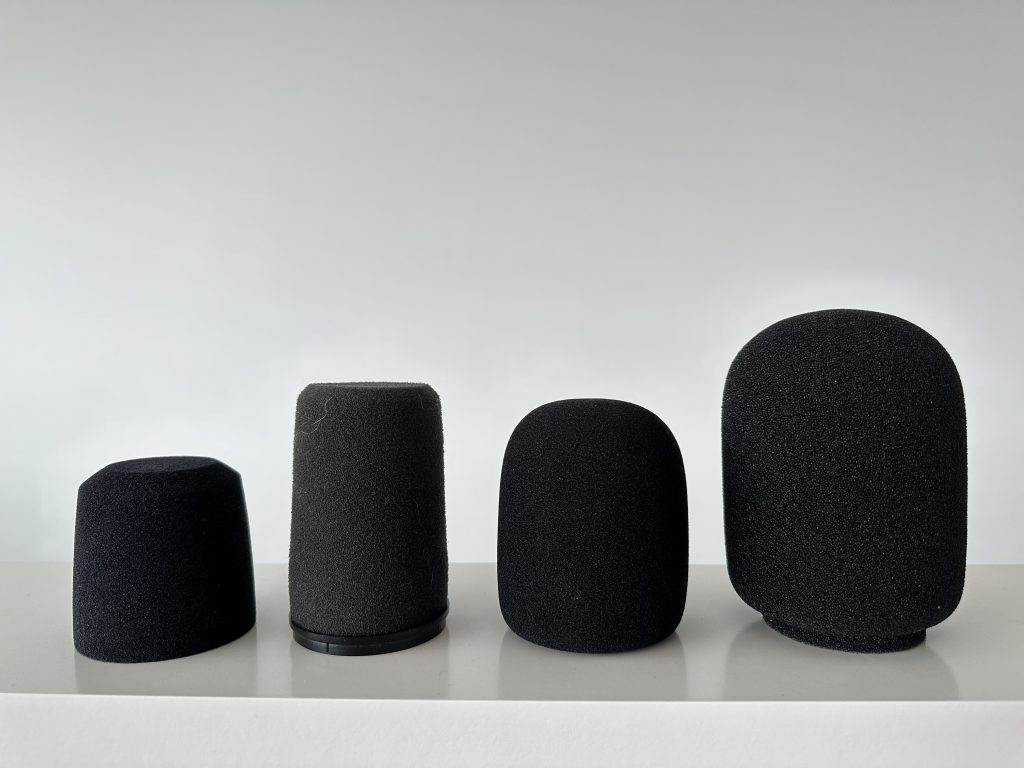
Mit dem SM7B wird noch der ganz dicke Windschutz A7WS im Bild rechts mitgeliefert und ist für Situationen gedacht, bei denen jemand ins Mikro sprechen soll, der keinerlei Erfahrung mit Mikrofonen hat. Ganz links im Bild der zu simple Schutz des MV7, dann rechts davon der RK345 des SM7B und noch ein weiterer Schutz, der mit meinem Mikrofongalgen geliefert wurde. Alle vier passen.
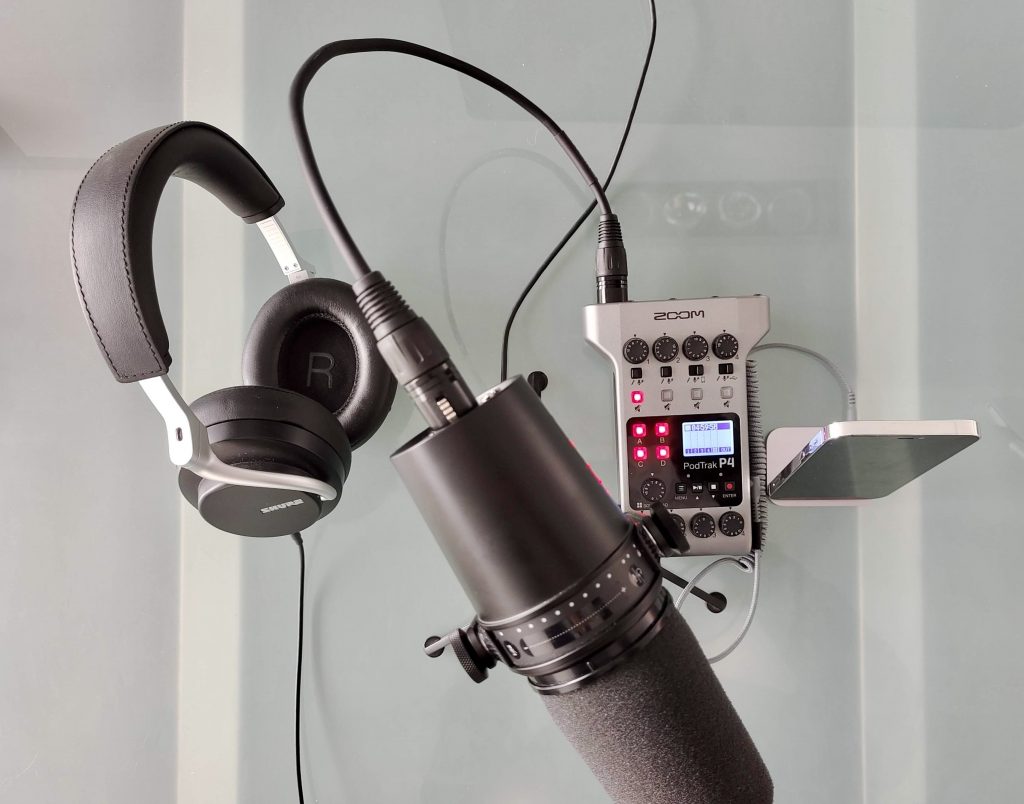
Das SM7B wird über ein XLR-Kabel mit einem Audio-Interface verbunden. Der Stecker wird dabei in einer Buchse verriegelt, die sich außerhalb des Mikrofonkörpers am Haltebügel verbindet. Von dort führt ein dünneres Kabel zum Mikrofon. Auf diese Weise ist es sehr gut entkoppelt von Geräuschen, die über ein baumelndes Kabel induziert würden. Außerdem muss das Mikrofon nicht das Gewicht des XLR-Kabels tragen.

Beim MV7 dagegen wird das XLR-Kabel direkt in die Rückseite des Mikrofons gesteckt. Dort findet man aber noch zwei weitere Anschlüsse, die bereits auf eine wichtige Ergänzung hinweisen. Das MV7 hat neben dem XLR-Anschluss auch noch ein USB-Interface und einen Kopfhöreranschluss. Zwei drei Meter lange USB-Kabel für USB-A und USB-C liefert Shure mit. Bei beiden Mikrofonen muss man ggfls. ein XLR-Kabel und einen Mikrofon-Ständer bzw. -Galgen beistellen. Ich verwende den Logilink AA0127 Mikrofonarm. Sucht man ein bewegliches Stativ, dann empfehle ich die Produkte von König und Meyer.
Das USB-Kabel lässt sich in einen PC oder einen Mac stecken und das MV7 taucht dort als USB-Headset mit Mikro und Kopfhörer auf. Das eröffnet eine zweite Betriebsart, die parallel funktioniert. Man kann also gleichzeitig per XLR in ein Interface oder einen Mixer gehen und parallel auch per USB in einem PC/Mac. Ich habe stets nur das eine oder das andere verwendet.
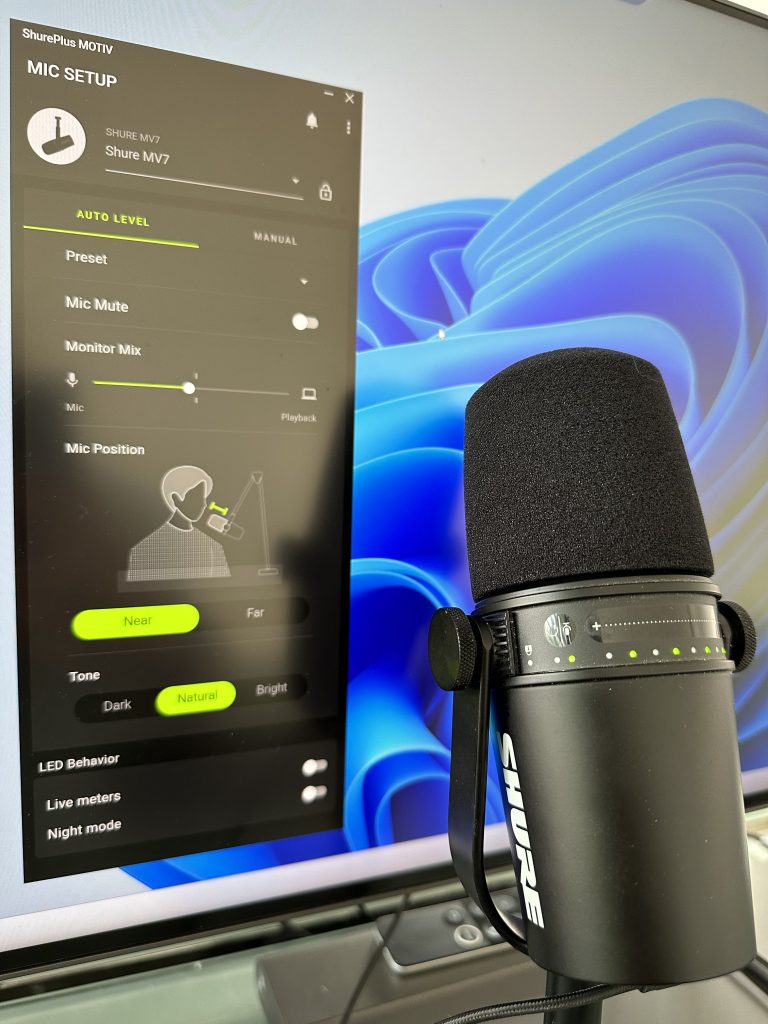
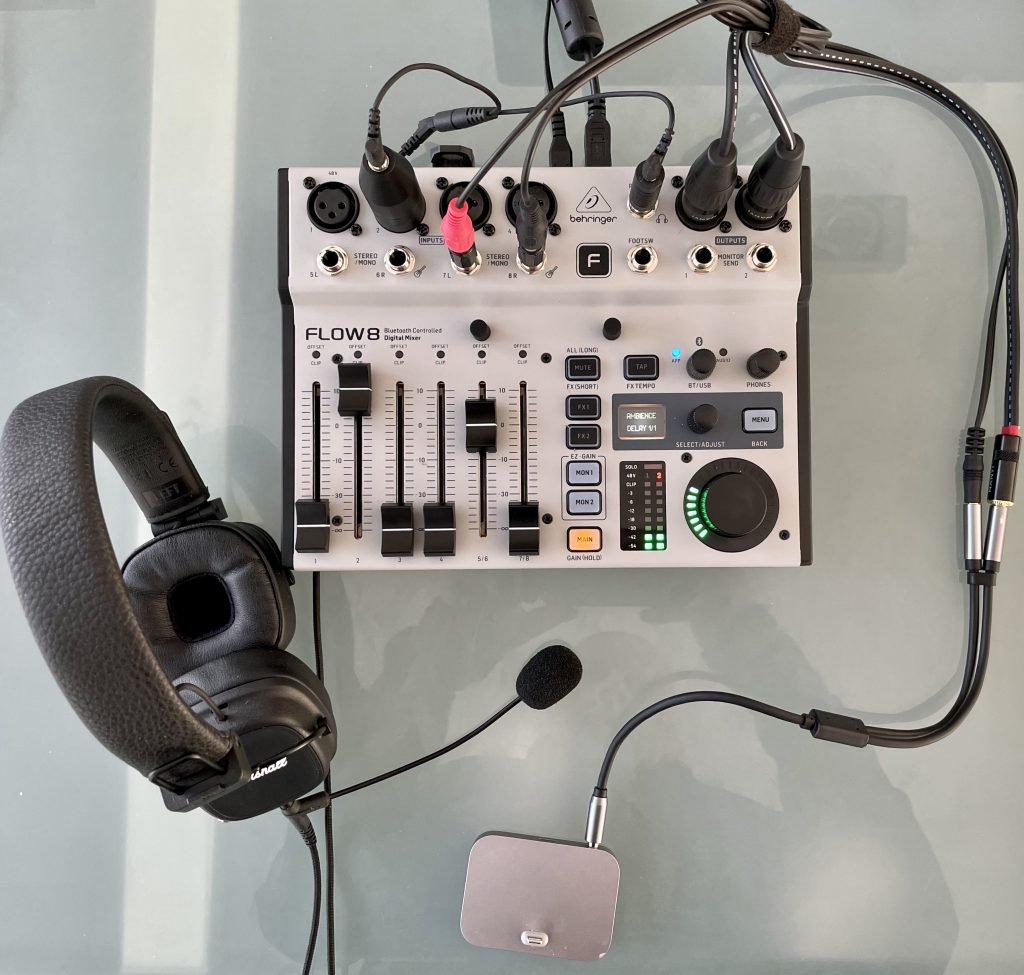
Schließt man das MV7 per USB an, dann erwachen neue Funktionen. Auf der Oberseite des Mikro leuchten LEDs auf. Dieser LED-Streifen ist berührungssensitiv und lässt sich zur Regelung der Kopfhörerlautstärke, des Mikrofon-Gains sowie des Mischverhältnis von Soundausgabe und Monitor auf dem Kopfhörer nutzen. Diesen Regler schaltet man durch ein Touchfeld an einer Seite des Reglers um, ein Touchfeld am anderen Ende dient der Stummschaltung des Mikros. Ergänzt werden diese Möglichkeiten durch eine PC/MAC-Software mit dem Namen ShurePlus MOTIV. Das eingebaute Soundinterface hat einen Limiter, einen Kompressor, einen Tiefpass und eine Präsenzerhöhung. Die Bedienung ist sehr einfach gehalten und eher für den Einsteiger als den Soundprofi geeignet.
Welches Mikrofon klingt nun besser? Immerhin kostet ein SM7B stolze 389 Euro und dazu kommt noch ein Sound Interface wie das von mir präferierte Elgato Wave XLR. Ein Shure MV7 dagegen gibt es bereits für 269 Euro und ein Shure MV7X, ein reines XLR-Mikrofon ohne USB-Interface, für 100 Euro weniger.
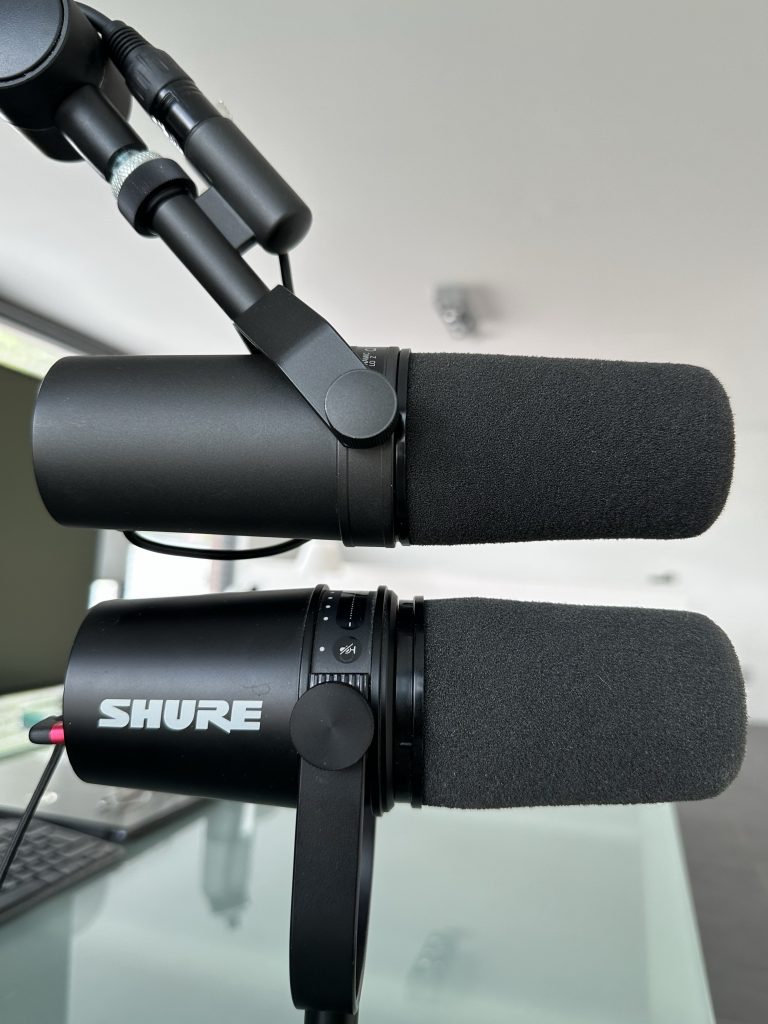
Einigermaßen überraschende Erkenntnis: Bei Sprachaufnahmen finde ich das MV7 besser, wenn man den RK345 montiert hat. Dieser Windschutz sorgt für einen besseren Abstand zur Mikrofonkapsel und verhindert viel effektiver Popp- und Zischlaute als der Originalwindschutz. Zusammen kosten beide knapp unter 300 Euro und ich habe immer noch die Möglichkeit, auch ein Mischpult oder ein Audio-Interface per XLR analog anzuschließen. Als Podcast- oder Streamer-Mikrofon ist das MV7 universeller, ohne einen erkennbar schlechteren Klang als das SM7B abzuliefern.
Aber machen wir uns nichts vor. Du willst immer noch das SM7B, weil es einfach besser aussieht und weil mal es haben muss. 😉Wo das SM7B schlank und elegant daherkommt, hat Shure dem pummeligen MV7 einen fetten Werbeschriftzug verpasst. Shure hat von Rode gelernt und weiß sehr wohl, dass das Mikro in vielen Streams auftauchen wird.
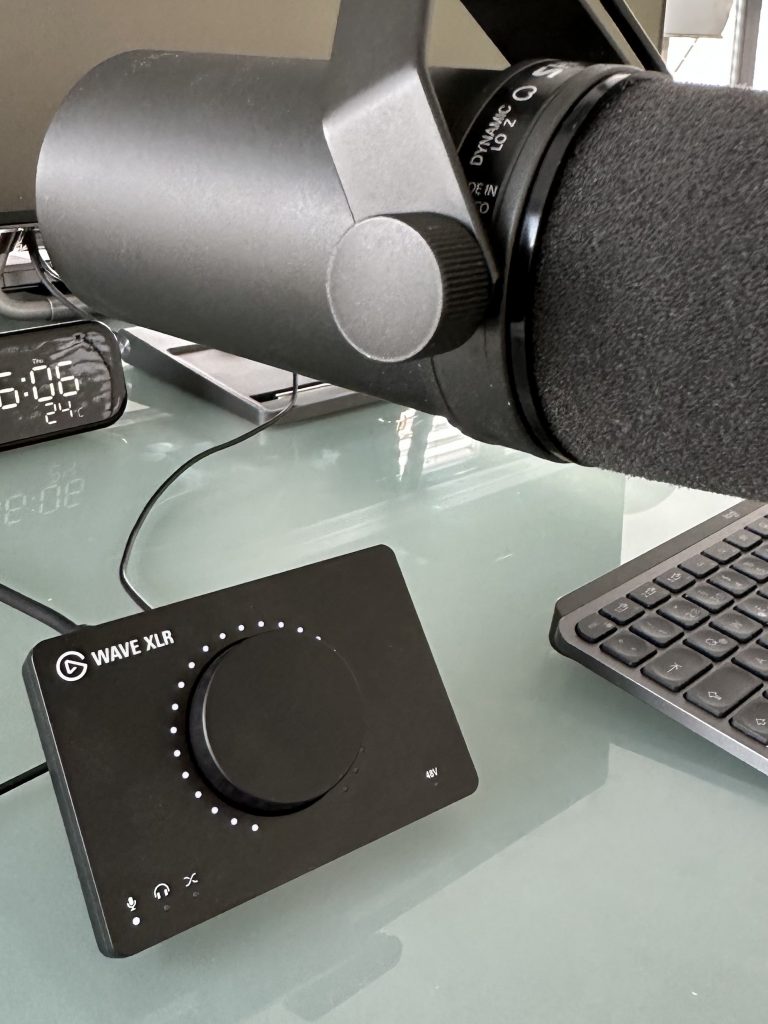
Ich hatte vor dem Test ein bisschen Bammel, ob mein Elgato Interface überhaupt genug Leistung hat, um das als leise gefürchtete SM7B ausreichend zu verstärken. Diese Sorge hat sich als unbegründet erwiesen. Am Wave XLR liefert das SM7B auch ohne Fethead oder Cloudlifter genug Druck.
Ich habe mit beiden Mikros einige Aufnahmen gemacht und ich kann sie nicht blind auseinanderhalten. Der Wechsel des Mikros hat einen viel kleineren Einfluss als die Entfernung, aus der ich sie bespreche. Diese dynamischen Mikrofone haben einen starken Nahsprecheffekt. Geht man dicht ran und dreht den Pegel etwas runter, dann bekommt man eine bassbetonte Radiostimme. Der Effekt fällt in wenigen Zentimetern stark ab. An das MV7 kommt man dichter ran und deshalb boomt es mehr. In dieser Aussteuerung stört auch ein halliger Raum nicht. Bespricht man ein SM7B aus größerer Entfernung, dann stiegen die Ansprüche an den Aufnahmeraum. Bei professionellen Studios ist das kein Problem, aber neben einem brummenden Spiele-PC wäre das MV7 die bessere Wahl.