
(tl;dr vowe: Abdelkader erklärt, wie man zentral Apps verteilen kann, die keinen Zugriff auf Geschäftsdaten haben. Typisches Beispiel: Social Media Apps für Social Media Teams im Marketing.)
Apple ermöglicht in Verbindung mit einer MDM-Lösung die Verteilung von Apps auf iPhone und iPad. Die App-Verteilung gehört zu den Kernfunktionen eines Mobile Device Managements: Geschäftlich erforderliche Anwendungen werden zentral bereitgestellt und können automatisch installiert werden.
Apps, die über das MDM automatisch installiert werden, erhalten den Status managed und können auf dienstliche Daten zugreifen. Diese Daten werden als managed Data klassifiziert. Die Trennung zwischen privaten (unmanaged) und geschäftlichen (managed) Bereichen ist dabei ein zentrales Sicherheitsmerkmal von iOS und iPadOS. Über MDM-Richtlinien lässt sich sicherstellen, dass managed- und unmanaged-Daten strikt getrennt bleiben. Beispielsweise kann verhindert werden, dass ein Dokument aus einem geschäftlichen E-Mail-Konto in eine private Messaging-App exportiert wird. Auch die Nutzung der Zwischenablage zwischen verwalteten und unverwalteten Apps kann unterbunden werden.
Es existieren Szenarien, in denen Organisationen Apps auf iPhone oder iPad bereitstellen möchten, ohne diesen Anwendungen Zugriff auf geschäftliche Daten zu gewähren. Ein typisches Beispiel ist ein Social-Media-Team, das verschiedene Apps benötigt. Diese Apps sollen für die tägliche Arbeit verfügbar sein, jedoch keinen Zugriff auf dienstlichen Daten erhalten. Zur Umsetzung dieses Szenarios muss die MDM-Lösung „Managed Distribution for Users“ unterstützen. In BlackBerry UEM ist diese Funktion implementiert.
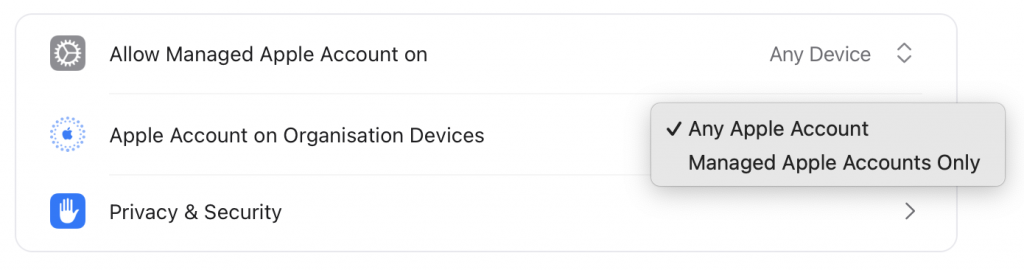
Im Folgenden werden die technischen Voraussetzungen und Konfigurationsschritte beschrieben. Damit die Verteilung unverwalteter Apps über den BlackBerry UEM funktioniert, muss der BlackBerry UEM in der Version 12.23 QF2 (On-Premise oder Cloud) installiert sein und an den Apple Business Manager angebunden sein. Im BlackBerry UEM muss auch ein gültiges VPP-Token eingerichtet sein. Über das Apple Volume Purchasing Program werden die zu verteilenden Apps beschafft. In meinem Beispiel verwende ich ein per Apple Device Enrolment am UEM aktiviertes iPhone mit iOS 26.3. Mit einer reinen MDM-Aktivierung würde es auch funktionieren. Da die Apple für die unverwaltete App Installation einen Apple Account erfordert, benötigen wir einen Persönlichen oder Managed Apple Account. Seit September 2025 erlaubt Apple im Apple Business Manager verwaltete Endgeräte auf die Nutzung mit Managed Apple Accounts einzuschränken. Entspricht die E-Mail-Adresse des BlackBerry-UEM-Benutzers dem Managed Apple Account, führt BlackBerry UEM das VPP-Enrolment automatisch durch. Bei einem persönlichen Apple Account oder wenn sich die Benutzernamen unterscheiden, muss das Enrolment manuell abgeschlossen werden. Der Benutzer bekommt hierfür im Enterprise App Store (Work Apps) einen Hinweis. Diese Setup ermöglicht die benutzerbasierte App-Zuweisung und gleichzeitig wird der Zugriff auf die managed Data verhindert. In diesem Beispiel werden die Apps Ice Cubes for Mastodon und Bluesky als unverwaltete Anwendungen bereitgestellt. Beide Apps wurden im Apple Business Manager in ausreichender Lizenzanzahl für den Standort des BlackBerry UEM-Servers beschafft.
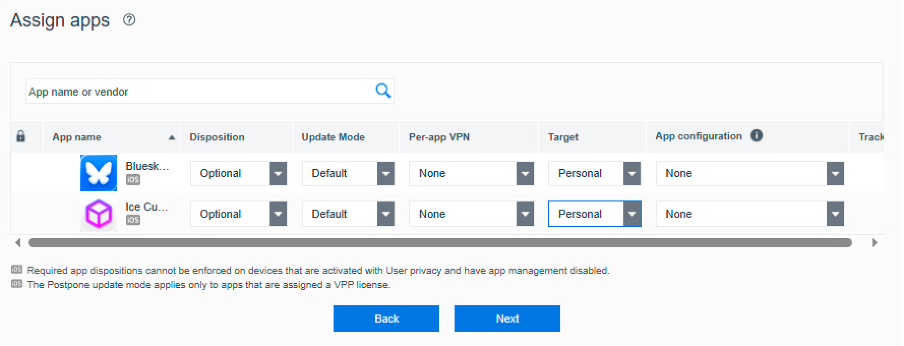
Zur strukturierten Zuweisung wird eine Benutzergruppe mit der Bezeichnung „Social Media Apps“ erstellt, der anschließend beide Anwendungen zugewiesen werden. Für jede App ist die Disposition auf „Optional“ zu setzen und das Target auf „Personal“ zu konfigurieren. Nur mit diesen Einstellungen ist gewährleistet, dass die Anwendungen nach der Installation durch den Benutzer unverwaltet bleiben. Da es sich um unverwaltete Apps handelt, können weder App-Configuration-Profile noch Per-App-VPN-Profile zugewiesen werden.
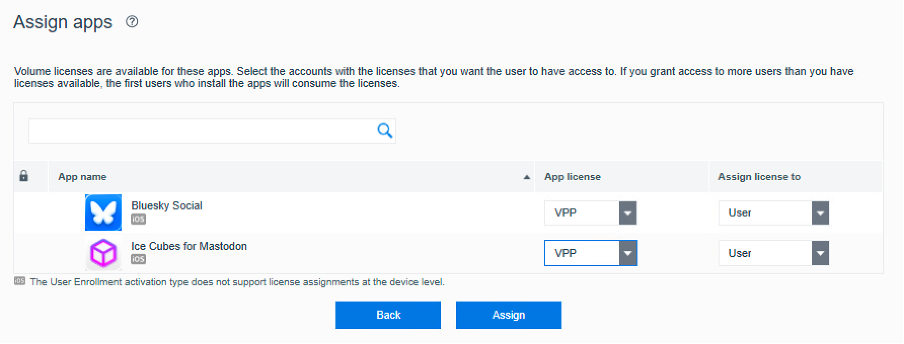
Die Lizenzierung erfolgt jeweils über eine VPP-Benutzerlizenz. Nach Erstellung der Gruppe werden die entsprechenden Benutzer hinzugefügt.
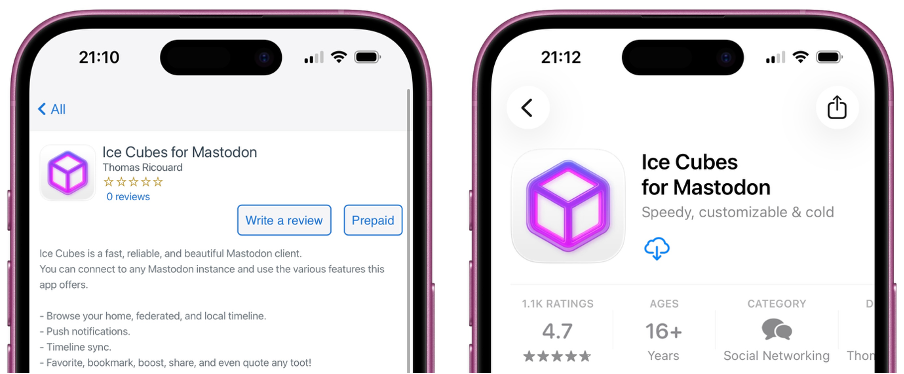
Auf dem iPhone meldet sich der Benutzer im App Store mit seinem Apple Account an. In diesem Szenario wird ein Managed Apple Account verwendet. Managed Apple Accounts können selbst keine Apps beschaffen, weshalb der Einsatz von Managed Distribution for Users der einfachste Weg ist diesen Accounts App-Lizenzen zuzuweisen. Anschließend öffnet der Benutzer auf dem durch BlackBerry UEM verwalteten iPhone den Enterprise App Store mit der Bezeichnung Work Apps. Dort erscheinen die zugewiesenen Anwendungen im Reiter New. Über den Button Prepaid erfolgt die Weiterleitung in den Apple App Store, von dem aus die Installation gestartet werden kann. Sollte der Download-Button noch deaktiviert sein, empfiehlt es sich, den Vorgang nach einigen Minuten zu wiederholen, da die VPP-Infrastruktur von Apple in Einzelfällen etwas Zeit benötigt, um Lizenzen den jeweiligen Apple Accounts zuzuweisen.
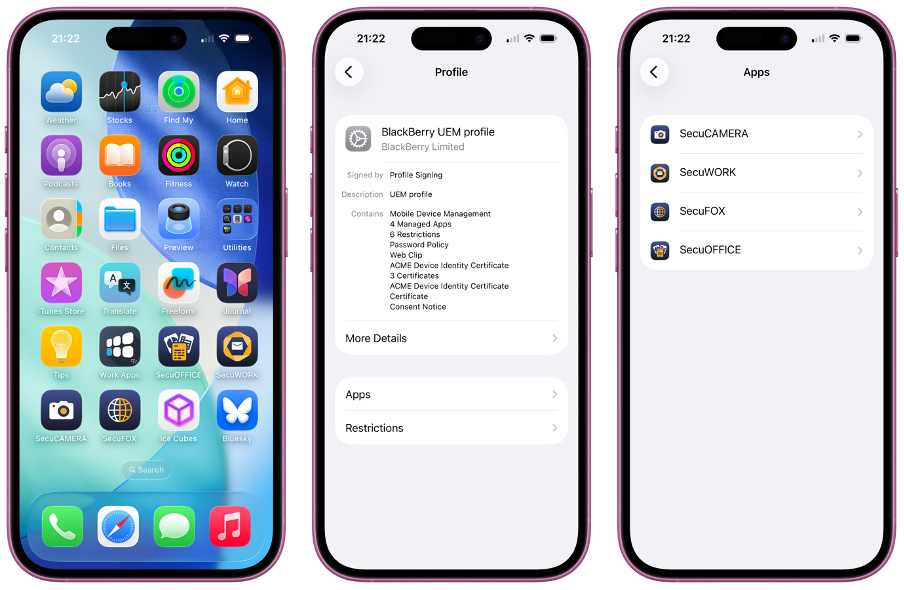
Nach erfolgreicher Installation lässt sich im MDM-Profil unter „Apps“ verifizieren, dass die über Managed Distribution for Users bereitgestellten Apps dort nicht aufgeführt sind. Sie gelten somit als unverwaltet und besitzen keinen Zugriff auf geschäftliche Daten. In diesem Beispiel sind nur die vier Secu-Apps verwaltet.
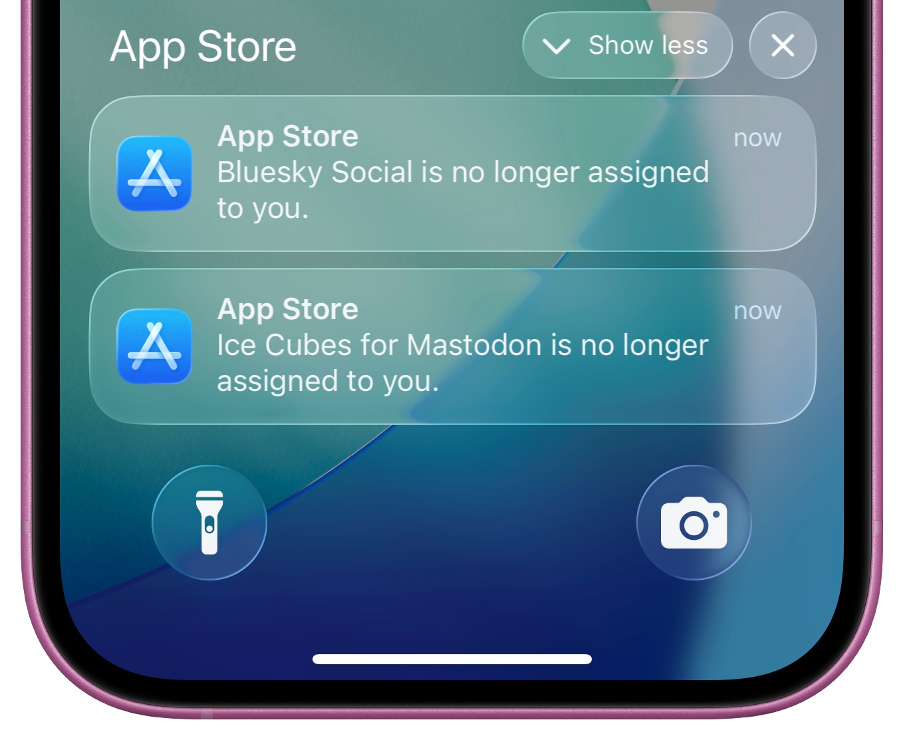
Managed Distribution for Users ermöglicht den Entzug zugewiesener App-Lizenzen. Da die Anwendungen unverwaltet sind, werden sie nach dem Lizenzentzug nicht vom Endgerät entfernt. Nach Entzug der Lizenz kann der Benutzer die App noch bis zu 30 Tage weiterverwenden. Diese Funktion ist insbesondere bei kostenpflichtigen Apps relevant, da Lizenzen dadurch einem anderen Benutzer zugewiesen werden können, ohne erneut eine Lizenz erwerben zu müssen. Über den Lizenzentzug wird der Benutzer im App Store entsprechend informiert.