Apple erhöht die Preis, quer durch alle Produkte. Wer demnächst Hardware kaufen will, sollte deshalb schnell handeln, solange es noch Lagerbestände zu alten Preisen im Handel gibt. Hier eine Liste von Produkten, die heute noch bis Mitternacht im Prime Day gehandelt werden:
Apple will officially remove support for legacy MDM-based software update management in all 27 operating systems.
Announced last year, legacy software update management no longer functions in all 27.0 operating systems.
Software update commands, queries, recommended cadence settings, and update restrictions such as deferrals and Background Security Improvements will no longer function using the MDM protocol.
Going forward, your MDM solution must use Declarative Device Management (DDM) to manage and enforce operating system updates. Now it is time to check with your MDM vendor and confirm they have implemented this. BlackBerry UEM has DDM implemented and automatically switches capable devices over from MDM. There is no manual action required from the administrator to make the switch.
"Apple, Google, and Meta are very excited to announce the release of new AI-driven products. We guarantee that they will respect your privacy. Unfortunately, these products are not available in Europe, as they have laws to protect your privacy."
Ihr kennt das: “Der Schutz deiner Daten ist uns sehr wichtig. Deshalb fragen wird dich jedesmal, bis du nachgibst, ob wir deine Daten mit unseren 863 Partnern teilen dürfen.”
Vergiss das lächerliche Windows Recall, das nur Screenshots machte und auswertete. In Zukunft will AI alles wissen und bewerten, was du siehst, speicherst, überträgst. Das soll zunächst dem Jugendschutz dienen, aber warum da aufhören? AI will deine Fotos kennen, deine Mails, deine Nachrichten, deinen Terminkalender etc. Damit AI für dich denken und handeln kann. Um dir ein Konzert-Ticket zu kaufen, muss es natürlich auch an dein Geld kommen.
Warum gibt es Siri AI nicht in der EU? Weil die EU nicht zulässt, dass Apple-Sachen nur mit Apple-Sachen funktionieren. Beispiel: iPhone-Spiegelung. Gibt es seit Jahren, aber nicht hier. Man kann ein Android auf den PC spiegeln, weil dort der Hersteller kein eigenes Öko(nomie)-System schützt. Aber bei iPhone geht es nicht, weil Apple will, dass du dir einen Mac kaufst.
Ich finde das, was Betty Bowsers da schreibt, sehr amüsant. Aber hier liegt sie daneben. Es geht überhaupt nicht um Privacy. Die ist in Zeiten von AI sowieso tot. Es geht um den DMA, den Digital Markets Act, der die Amis so sehr stört, dass sie lieber die EU zerstören wollen.
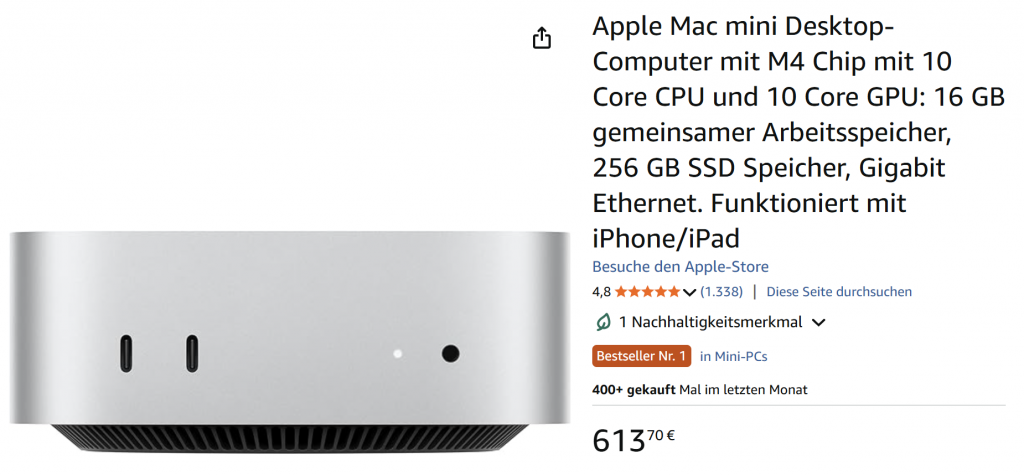
Der Mac mini war stets der Geheimtipp für den preiswertesten Mac, den man kaufen konnte. Dieses Modell mit 16 GB RAM und 256 GB Storage hat Apple jetzt gestrichen. Die Preise beginnen jetzt bei 949 € und selbst diese Geräte sind schlecht verfügbar.
Wer jetzt noch einen Mac zum Einsteigerpreis kaufen will, sei auf den Amazon Retourenkauf verwiesen. Das gibt es noch ein paar Geräte, die von Kunden an Amazon zurückgeschickt wurden und als neuwertig gelten.
Laut CEO Tim Cook wird Apple auf längere Zeit nicht so viele Mac mini und Mac Studio produzieren können, wie sie verkaufen könnten. Deshalb lässt Apple einfach das billigste Modell weg, um mit den teureren Geräten mehr zu verdienen. Clever.
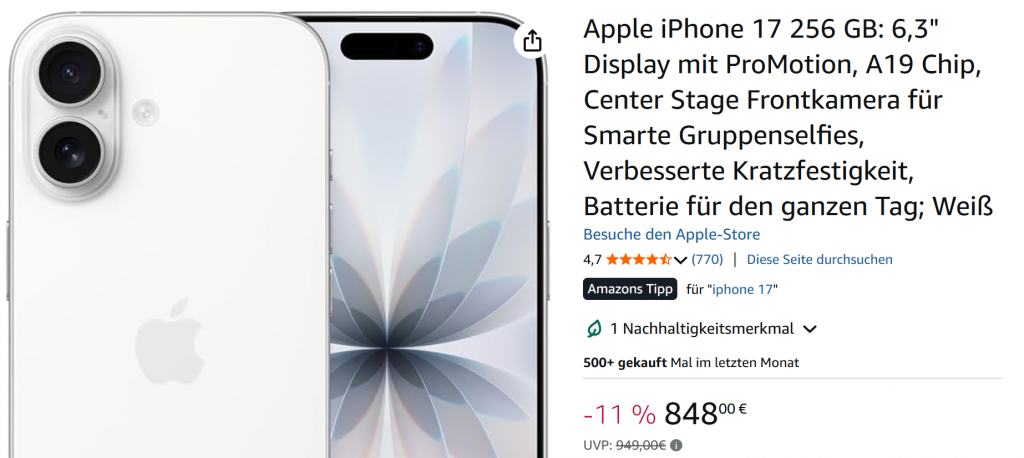
Ich bin ein großer Fan des iPhone 17. Das hat für mich das beste Verhältnis von Preis und Leistung bei den iPhones. Und ich finde es viel schöner als die Pro-Modelle. Mittlerweile hat Amazon es für 100 Euro weniger als Apple.
Nochmal 200 Euro weniger kostet das iPhone 17e, das bei den Kameras und beim Display weniger leistet als das “normale” 17.
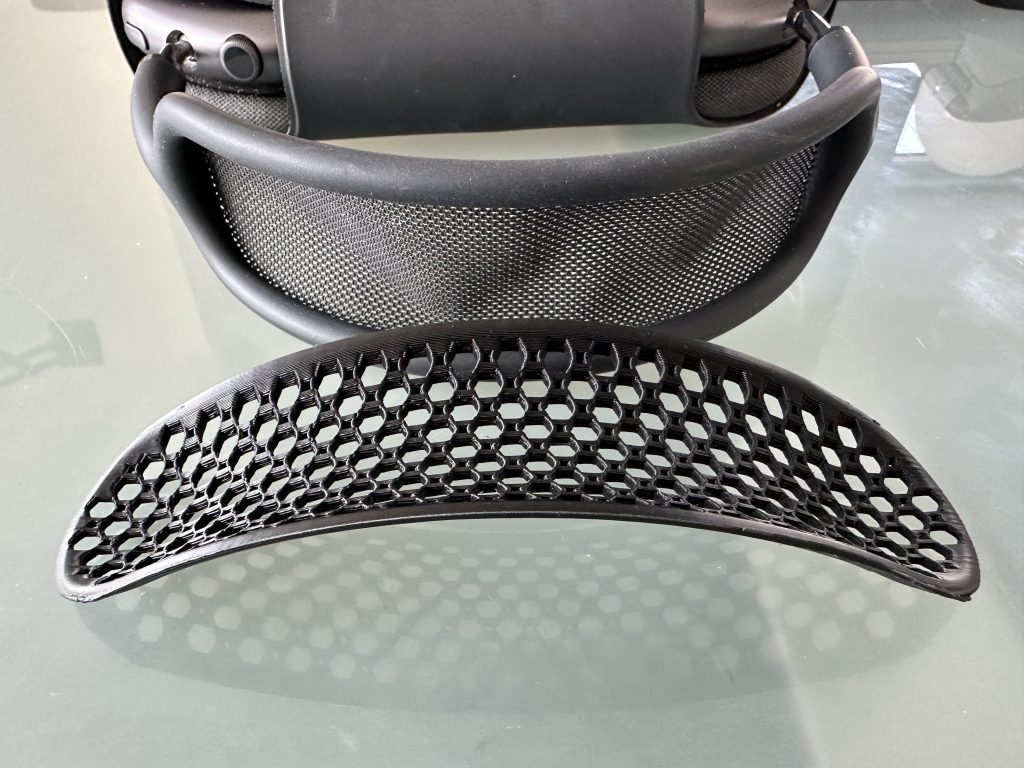
In meinem letzten Beitrag hatte ich über das Mesh des AirPods Max gemeckert und gleich mehrere Tipps bekommen, wie man das ergänzen kann. Bernd Lutz hatte sich angeboten, mir ein Inlay zu drucken. Und da ich bei der Gelegenheit gelernt habe, dass Bernd so nahe bei mir wohnt, dass man das Teil quasi werfen kann, habe ich dankend angenommen.
Ich habe mir aber ein anderen Modell ausgesucht als er selbst verwendet, und das hat er mir gestern in PLA und in TPU gedruckt, jeweils die 7-mm-Variante. Das härtere von beiden konnte ich nicht erfolgreich einsetzen, weil es gleich durchbrach. Das flexiblere aber macht genau das, was ich mir wünsche. Und es sieht auch noch höchst professionell aus. Danke, Bernd!
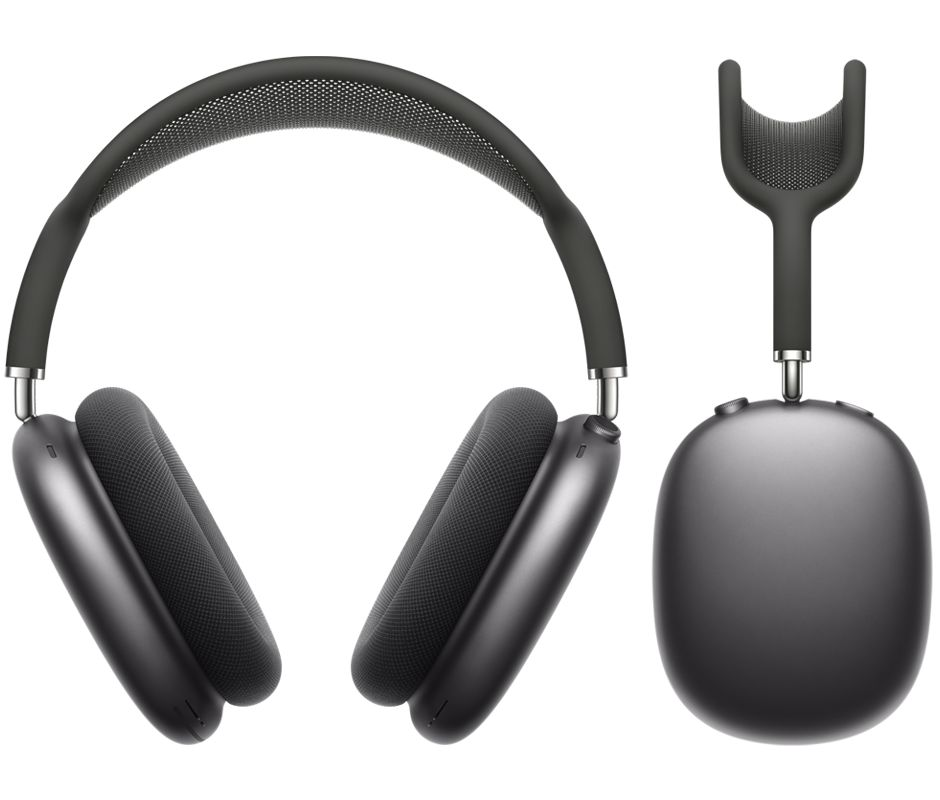
Mit der Power des H2 Chips sind AirPods Max besser denn je – mit effektiverem ANC, verbesserter Klangqualität und neuen Funktionen wie Adaptives Audio und Live Übersetzung
Das ist überfällig und hätte mit der Umrüstung auf USB-C kommen müssen. AirPods Max sind damit auf dem gleichen Niveau wie AirPods Pro 2 und 3.
Kund:innen in den USA und mehr als 30 weiteren Ländern und Regionen können AirPods Max 2 ab Mittwoch, 25. März unter apple.com/de/store und über die Apple Store App bestellen. Die Auslieferung beginnt Anfang nächsten Monats, und die Kopfhörer werden ab dann auch in den Apple Stores erhältlich sein.
AirPods Max 2 sind ab 579 Euro inkl. MwSt. erhältlich
AirPods Max haben einen tollen Klang, sind ein bisschen auf der schweren Seite und haben eine wunderbare Fertigungsqualität. Über die Jahre macht aber das Mesh im Bügel schlapp und ich habe noch keine überzeugende Lösung gefunden, das zu reparieren.
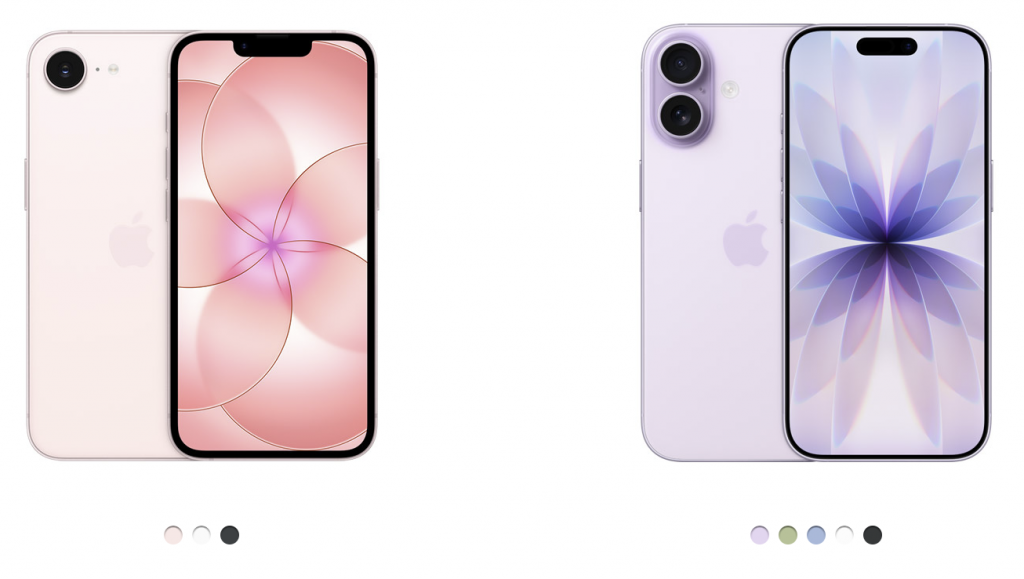
Ab morgen ist das iPhone 17e erhältlich. Vorbestellen kann man es seit letzter Woche. Das iPhone 17 erschien im Herbst. Welches nimmt man?
Das 17e hat, wie auf dem Bild einfach erkennbar, nur eine Hauptkamera. Die Superweitwinkelkamera fehlt. Wo braucht man die? Wenn man Innenaufnahmen macht, bei denen man nicht weit genug zurück gehen kann, um alles ins Bild zu bekommen. Finde ich sehr nützlich, auch wenn ich es selten nutze. Ein eigene Tele-Kamera haben beide nicht, eine Tatsache, die Apple mit viel Marketing-Sprech von “Fusion Camera” und “Optical Quality Zoom” verschleiert.
Weniger gut erkennbar ist, dass das 17e ein älteres Display hat, das mit einer festen Bildwiederholrate von 60 Hz arbeitet und nicht wie das 17 mit variablen Raten bis 120 Hz. Die sorgen einerseits für etwas eingesparte Energie bei gleichzeitig flüssigeren Bewegungen. In beiden ist ein A19-Prozessor, wobei beim 17e nur vier der fünf Grafikbeschleuniger aktiv sind. Das ist zu verschmerzen.
Wenn man nicht direkt bei Apple kauft, spart man beim 17 etwa 50 Euro. Das 17e ist noch mal satt 200 Euro billiger.
Alternativ gibt es auch das iPhone Air, das mittlerweile zu seinem Startpreis 300 Euro eingebüßt hat. Es hat ebenfalls nur eine Hauptkamera, dafür aber das bessere Display. Das iPhone 16e bleibt das billigste iPhone, allerdings hat es nur halb so viel Speicher wie das 17e und kein Magsafe.
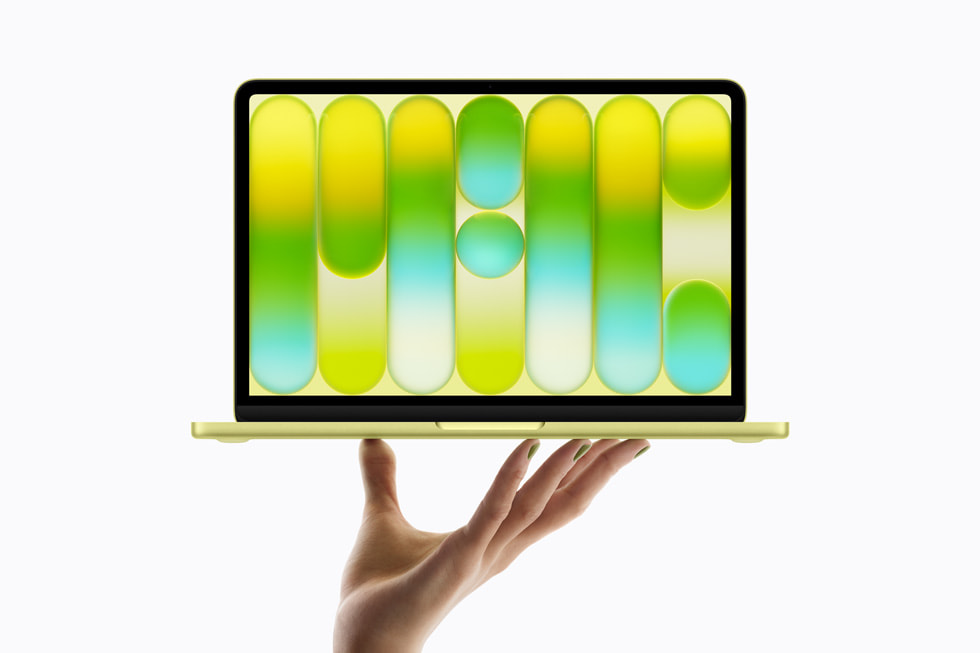
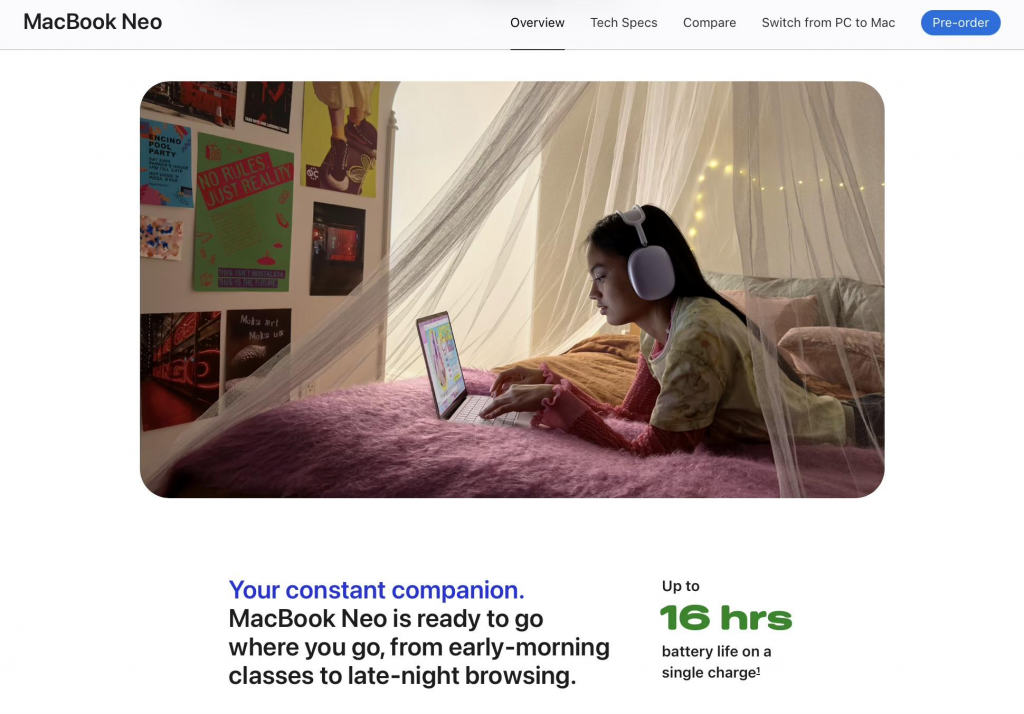
Diese Woche hat Apple sämtliche MacBooks überholt und mit dem Neo ein neues Modell angekündigt, das es ab 699 € zu kaufen gibt. Ich habe ein bisschen auf den Geräten herumgedacht und dabei festgestellt, dass ich zu den MacBook Pro M5/Pro/Max keine Meinung habe. Diese Rechner sind alle so absurd schnell, dass ich nicht seriös sagen kann, ob man diesen oder jenen kaufen sollte. Es wird sich vermutlich wegen des aktuelle KI-Hypes vor allem am Memory scheiden. Wer riesige Modelle lokal rechnen will, der wird viel Speicher brauchen. Und das macht diese Rechner dann absurd teuer.
Ein bisschen besser kann ich die Situation bei Neo und Air einschätzen. Neo erschließt einen neuen Einstandspreis mit etwa 700 Euro. Allerdings kostet ein Air M4 aktuell auch nur 200 Euro mehr und das ist ein wesentlich besserer und schnellerer Laptop. Doppelt so viel Arbeitsspeicher, besserer Bildschirm, bessere Tastatur, bessere Kamera, Thunderbolt statt USB-C.
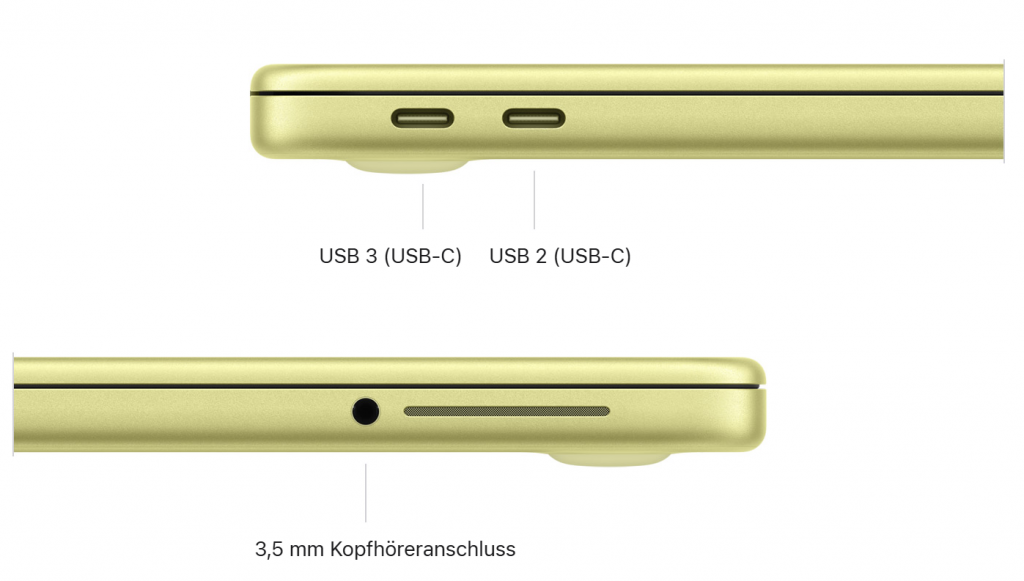
Der Neo hat nur zwei USB-C-Ports und einer davon ist ein lahmer USB 2, der 20x langsamer als der USB 3 ist! Thunderbolt wäre 80x schneller.
Der A18 Pro (mit einem Core weniger) stammt aus dem iPhone 16 Pro. Binned nennt man das, d.h. das sind die Prozessoren, die für das 2024er iPhone durchgefallen sind. Die Leistung entspricht am ehesten einem M1 und der liegt weit hinter einem M4.
Ich würde den Preis des MacBook Air M4 mal im Auge behalten. Und wenn das zu viel ist, dann würde ich wohl eher ein refurbished MacBook Air M1 als den Neo haben wollen.
Ich bin sehr für Einstiegsmodelle zu haben. Deshalb empfehle ich ja auch das einfache iPhone 17 und hätte auch mit dem iPhone 17e keine Schmerzen. Aber das Neo erscheint mir zu kurz geworfen. Und es ist schon ein wenig verrückt, dass die Preise so übereinstimmen. iPhone und MacBook kosten das gleiche, wenn man 17e mit Neo und 17 mit Air M4 vergleicht.
(tl;dr vowe: Abdelkader erklärt, wie man zentral Apps verteilen kann, die keinen Zugriff auf Geschäftsdaten haben. Typisches Beispiel: Social Media Apps für Social Media Teams im Marketing.)
Apple ermöglicht in Verbindung mit einer MDM-Lösung die Verteilung von Apps auf iPhone und iPad. Die App-Verteilung gehört zu den Kernfunktionen eines Mobile Device Managements: Geschäftlich erforderliche Anwendungen werden zentral bereitgestellt und können automatisch installiert werden.
Apps, die über das MDM automatisch installiert werden, erhalten den Status managed und können auf dienstliche Daten zugreifen. Diese Daten werden als managed Data klassifiziert. Die Trennung zwischen privaten (unmanaged) und geschäftlichen (managed) Bereichen ist dabei ein zentrales Sicherheitsmerkmal von iOS und iPadOS. Über MDM-Richtlinien lässt sich sicherstellen, dass managed- und unmanaged-Daten strikt getrennt bleiben. Beispielsweise kann verhindert werden, dass ein Dokument aus einem geschäftlichen E-Mail-Konto in eine private Messaging-App exportiert wird. Auch die Nutzung der Zwischenablage zwischen verwalteten und unverwalteten Apps kann unterbunden werden.
Es existieren Szenarien, in denen Organisationen Apps auf iPhone oder iPad bereitstellen möchten, ohne diesen Anwendungen Zugriff auf geschäftliche Daten zu gewähren. Ein typisches Beispiel ist ein Social-Media-Team, das verschiedene Apps benötigt. Diese Apps sollen für die tägliche Arbeit verfügbar sein, jedoch keinen Zugriff auf dienstlichen Daten erhalten. Zur Umsetzung dieses Szenarios muss die MDM-Lösung „Managed Distribution for Users“ unterstützen. In BlackBerry UEM ist diese Funktion implementiert.
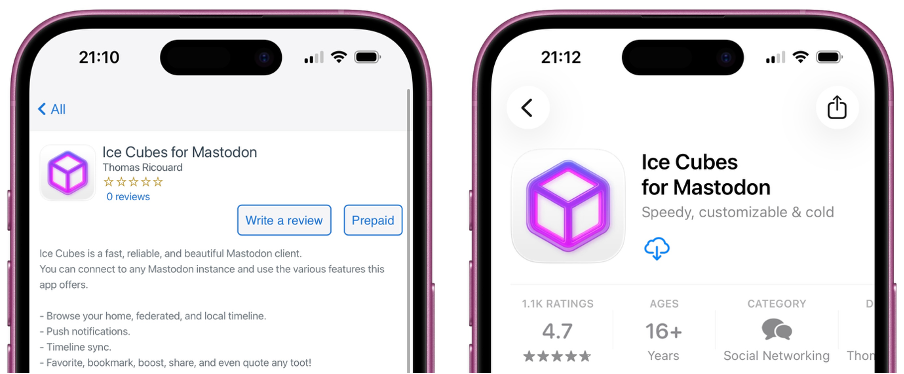
Im Folgenden werden die technischen Voraussetzungen und Konfigurationsschritte beschrieben. Damit die Verteilung unverwalteter Apps über den BlackBerry UEM funktioniert, muss der BlackBerry UEM in der Version 12.23 QF2 (On-Premise oder Cloud) installiert sein und an den Apple Business Manager angebunden sein. Im BlackBerry UEM muss auch ein gültiges VPP-Token eingerichtet sein. Über das Apple Volume Purchasing Program werden die zu verteilenden Apps beschafft. In meinem Beispiel verwende ich ein per Apple Device Enrolment am UEM aktiviertes iPhone mit iOS 26.3. Mit einer reinen MDM-Aktivierung würde es auch funktionieren. Da die Apple für die unverwaltete App Installation einen Apple Account erfordert, benötigen wir einen Persönlichen oder Managed Apple Account. Seit September 2025 erlaubt Apple im Apple Business Manager verwaltete Endgeräte auf die Nutzung mit Managed Apple Accounts einzuschränken. Entspricht die E-Mail-Adresse des BlackBerry-UEM-Benutzers dem Managed Apple Account, führt BlackBerry UEM das VPP-Enrolment automatisch durch. Bei einem persönlichen Apple Account oder wenn sich die Benutzernamen unterscheiden, muss das Enrolment manuell abgeschlossen werden. Der Benutzer bekommt hierfür im Enterprise App Store (Work Apps) einen Hinweis. Diese Setup ermöglicht die benutzerbasierte App-Zuweisung und gleichzeitig wird der Zugriff auf die managed Data verhindert. In diesem Beispiel werden die Apps Ice Cubes for Mastodon und Bluesky als unverwaltete Anwendungen bereitgestellt. Beide Apps wurden im Apple Business Manager in ausreichender Lizenzanzahl für den Standort des BlackBerry UEM-Servers beschafft.
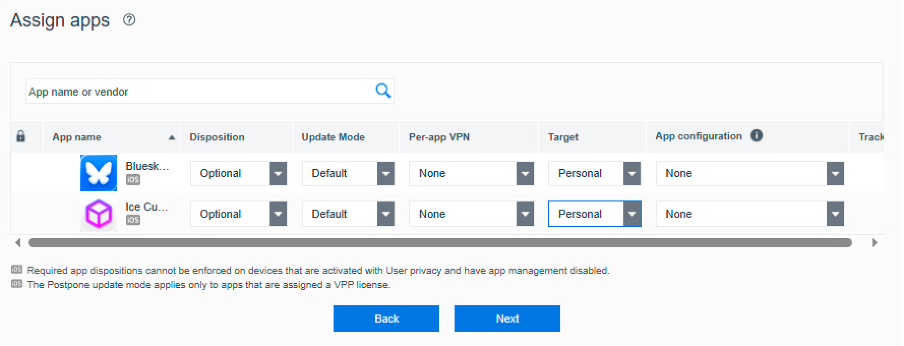
Zur strukturierten Zuweisung wird eine Benutzergruppe mit der Bezeichnung „Social Media Apps“ erstellt, der anschließend beide Anwendungen zugewiesen werden. Für jede App ist die Disposition auf „Optional“ zu setzen und das Target auf „Personal“ zu konfigurieren. Nur mit diesen Einstellungen ist gewährleistet, dass die Anwendungen nach der Installation durch den Benutzer unverwaltet bleiben. Da es sich um unverwaltete Apps handelt, können weder App-Configuration-Profile noch Per-App-VPN-Profile zugewiesen werden.
Screenshot BlackBerry UEM-Konsole – Disposition Optional & Target Personal
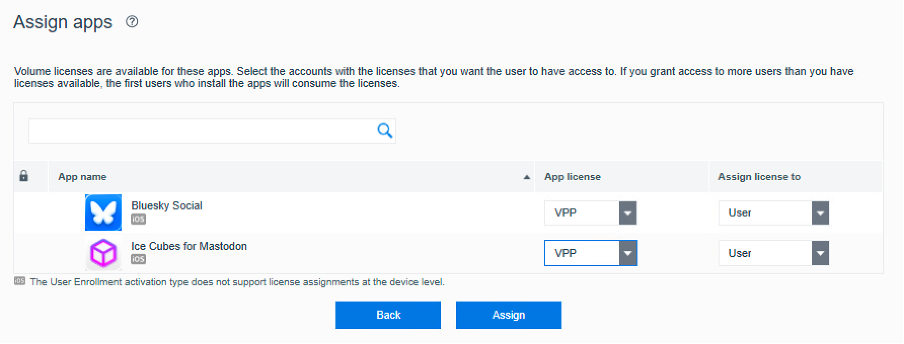
Die Lizenzierung erfolgt jeweils über eine VPP-Benutzerlizenz. Nach Erstellung der Gruppe werden die entsprechenden Benutzer hinzugefügt.
Screenshot BlackBerry UEM-Konsole – Apps mit VPP-Benutzerlizenz
Auf dem iPhone meldet sich der Benutzer im App Store mit seinem Apple Account an. In diesem Szenario wird ein Managed Apple Account verwendet. Managed Apple Accounts können selbst keine Apps beschaffen, weshalb der Einsatz von Managed Distribution for Users der einfachste Weg ist diesen Accounts App-Lizenzen zuzuweisen. Anschließend öffnet der Benutzer auf dem durch BlackBerry UEM verwalteten iPhone den Enterprise App Store mit der Bezeichnung Work Apps. Dort erscheinen die zugewiesenen Anwendungen im Reiter New. Über den Button Prepaid erfolgt die Weiterleitung in den Apple App Store, von dem aus die Installation gestartet werden kann. Sollte der Download-Button noch deaktiviert sein, empfiehlt es sich, den Vorgang nach einigen Minuten zu wiederholen, da die VPP-Infrastruktur von Apple in Einzelfällen etwas Zeit benötigt, um Lizenzen den jeweiligen Apple Accounts zuzuweisen.
Screenshot iPhone – Work Apps und Apple App Store mit Ice Cubes for Mastodon App
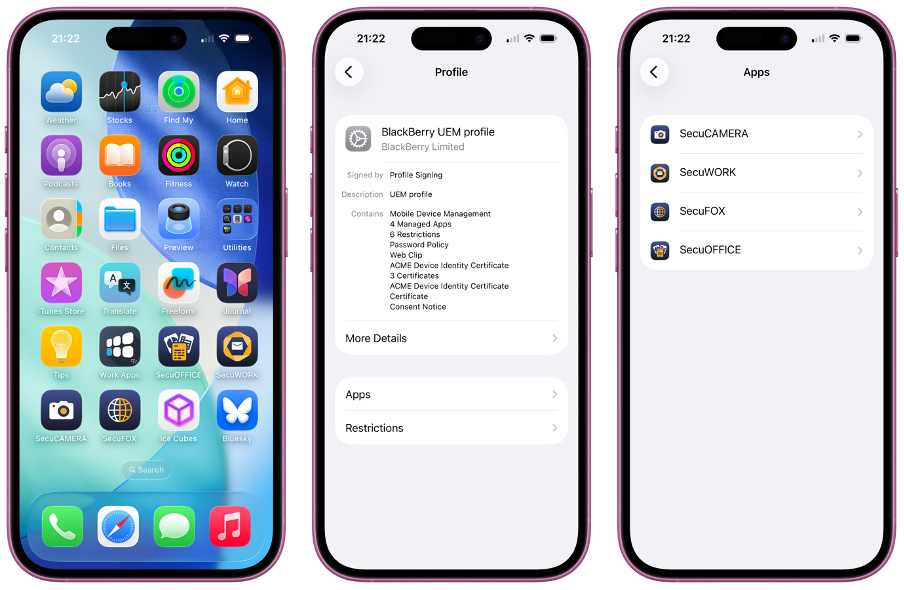
Nach erfolgreicher Installation lässt sich im MDM-Profil unter „Apps“ verifizieren, dass die über Managed Distribution for Users bereitgestellten Apps dort nicht aufgeführt sind. Sie gelten somit als unverwaltet und besitzen keinen Zugriff auf geschäftliche Daten. In diesem Beispiel sind nur die vier Secu-Apps verwaltet.
Screenshot iPhone MDM-Profil – verwaltete und unverwaltete Apps
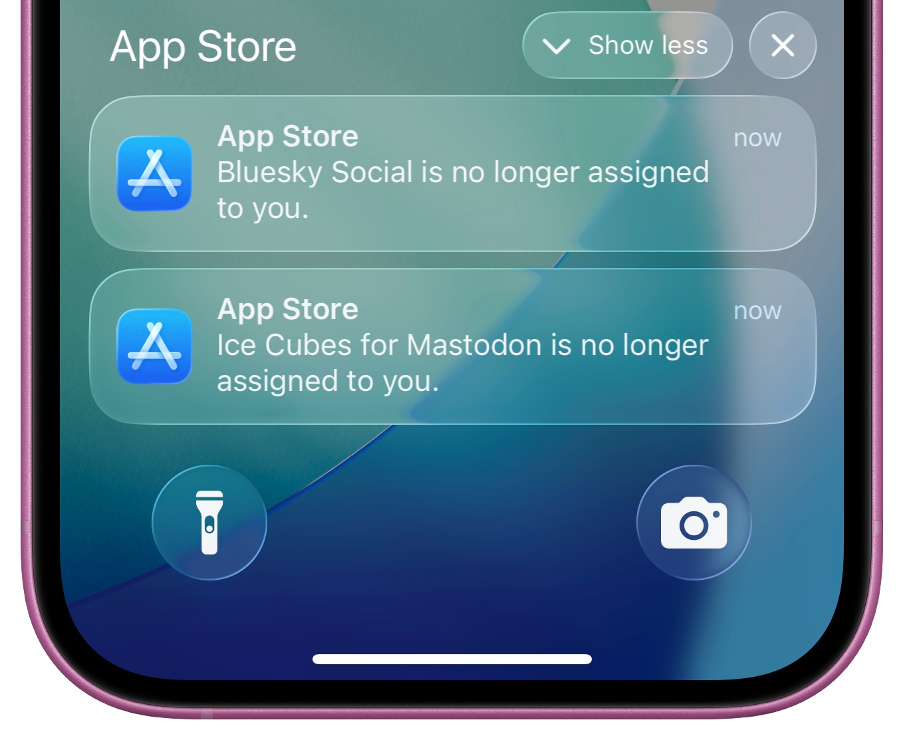
Managed Distribution for Users ermöglicht den Entzug zugewiesener App-Lizenzen. Da die Anwendungen unverwaltet sind, werden sie nach dem Lizenzentzug nicht vom Endgerät entfernt. Nach Entzug der Lizenz kann der Benutzer die App noch bis zu 30 Tage weiterverwenden. Diese Funktion ist insbesondere bei kostenpflichtigen Apps relevant, da Lizenzen dadurch einem anderen Benutzer zugewiesen werden können, ohne erneut eine Lizenz erwerben zu müssen. Über den Lizenzentzug wird der Benutzer im App Store entsprechend informiert.
Screenshot iPhone App Store – Lizenzen für Bluesky und Ice Cubes wurden entzogen
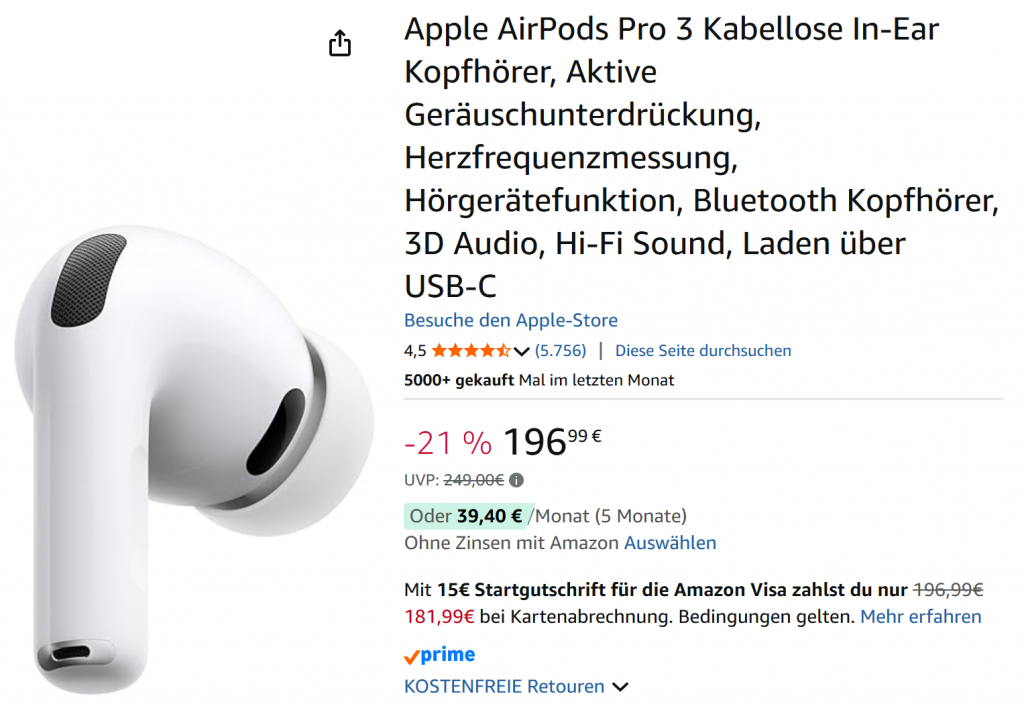
So langsam kommt Bewegung in die Amazon-Preise der neuesten iPhone-Generation. Vor Weihnachten waren sie noch so nachgefragt, dass der Preis stabil blieb. Aktuell sehe ich das iPhone 17 und das 17 Pro um 5% günstiger. Das macht schon mehr als 50 Euro aus. Das iPhone Air ist um mehr als 200 Euro gefallen.
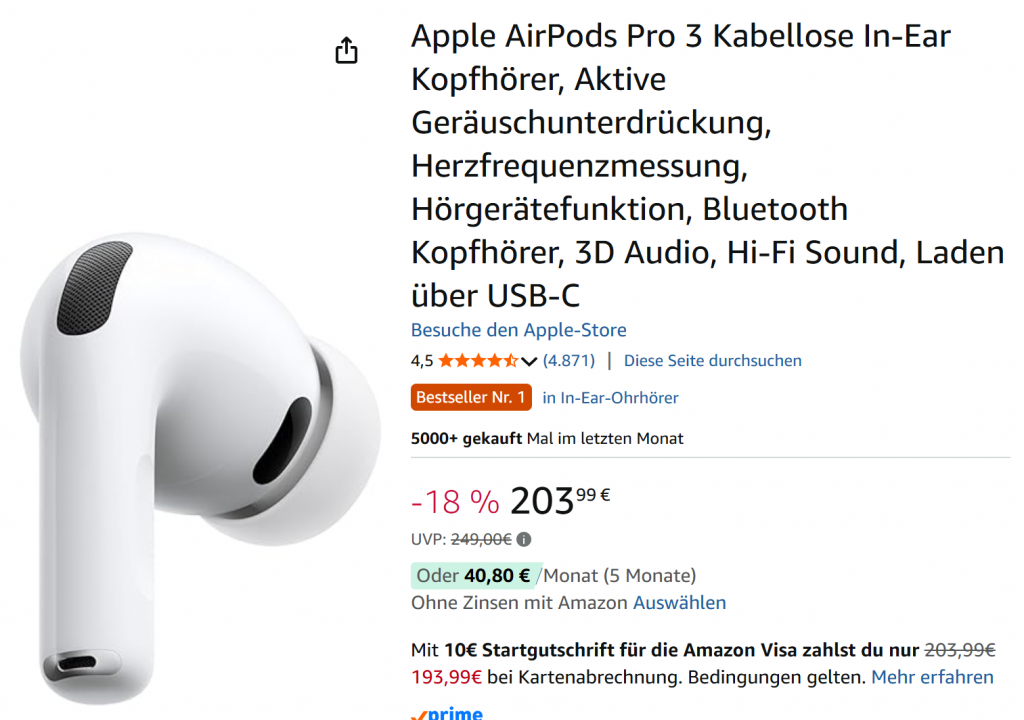
Auch die neusten AirPods Pro 3 sind jetzt 10% günstiger zu haben als bei Apple. Dort bleiben die einmal angekündigten Preise bis zu nächsten Generation stabil.
Ob das dieses Jahr auch so bleibt, bezweifle ich angesichts der rapide steigenden Speicherpreise. Immerhin ist die aktuelle iPhone-Generation durch die Bank mit 256 GB ausreichend ausgestattet, sodass man nicht aufrüsten muss. Ich finde auch den technischen Abstand zur Vorgängergeneration mit nur 128 GB und 60 Hz-Display zu groß, um das alte Modell in Betracht zu ziehen.
Nach drei Jahren war es Zeit für eine neue Batterie im iPhone 14 Pro. Heute morgen habe ich bei Apple eine entsprechende Service-Anfrage gestellt. Die Website lieferte mir die lokale Comspot-Filiale in Darmstadt als Service-Partner nebst einem Termin für 10:20. Dort gab ich das Gerät ab und machte mich auf zu meinem Zahnarzt-Termin. Avisiert war ein Service bis spätestens 18 Uhr und Abholung am selben Tag. “Wir wollen über Nacht nicht so viele Kunden-Geräte hier haben.”