Configure certificate-based VPN authentication in BlackBerry UEM for iPhones and iPads

If you want to use IKEv2-based VPNs for per Account and per App VPN and require certificate-based authentication, I will explain the required steps to make use of this in BlackBerry UEM. The below configuration assumes that the VPN username and actual username are different, e.g., vpnuser001@boui.de is the VPN username and abdelkader@boui.de is the username. The certificate for the VPN authentication is issued to the VPN username.

  1. Enable the use of custom variables in BlackBerry UEM. We will need this later on as this gives us a simple way to map the VPN certificate to the actual user account.
    • Login to the UEM console
    • Navigate to Settings-> General settings-> Custom variables
    • Enable the checkbox “Show custom variables when adding or editing a user”
    • For the variable %custom1% set the label to vpn_user_iphone
    • For the variable %custom2% set the label to vpn_user_ipad

    • It is necessary to differentiate between iPhone and iPad VPN accounts as in my setup I need to use one VPN certificate per device.
    • Click on Save.
  2. Configure the custom variables in user account
    • Navigate to Users-> All Users in the UEM console
      • Search for the user account you want to modify and open the user view
      • Click on the Edit button in the top right corner
      • In the new view navigate to the bottom and expand the section Custom variables. Enter the VPN username for the iPhone and iPad, respectively.

      • Click on Save.
  3. Create the two user credential profile – one for iPhones and one for iPads
    • In the UEM console navigate to Policies and profiles-> Managed devices-> Certificates-> User credential
    • Click on the plus symbol to create a new user credential profile
    • In the name field enter the name for the profile, e.g. vpn_user_iphone_certificate
    • In the drop-down list for Certificate authority connection select Manually uploaded certificate
    • Disable the checkboxes for macOS and Android
    • Click on Add to save the profile
    • Repeat the previous steps and create the user credential profile we will use with for the iPads, e.g., vpn_user_iphone_certificate
  4. Create the IKEv2 VPN profile
    • In the UEM console navigate to Policies and profiles-> Managed devices-> Networks and Connections-> VPN
    • Click on the plus symbol to create a new VPN profile
    • In the field Name enter a name for the profile, e.g., iphone_vpn_profile
    • As we will use the VPN profile only for iPhones and iPads, you can disable the checkboxes for macOS, Android and Windows
    • In the drop-down list Connection type select IKEv2
    • For Remote address enter your VPN gateway FQDN, e.g., vpngw.boui.de
    • For Local ID enter %custom1%
    • For Remote ID enter the remote ID of your VPN gateway, e.g., vpngw.boui.de
    • In the drop-down list Authentication type select User credential
    • We will get a new drop-down list named Associated user credential profile. Select the user credential profile we created for iPhones. In our case it is named vpn_user_iphone_certificate. This selection now gives us the mapping between the custom variable we have entered in Local ID and the VPN certificate, which we will assign to the user further down in this guide.
    • Confirm that Enable per-App VPN and Allow apps to connect automatically are enabled.
    • It is optional to add any domains. We will skip that for now.
    • In the drop-down list Traffic tunnelling confirm that Application layer is selected
    • All other settings depend on the requirements of your VPN solution. Configure the remaining as required.
    • Click on Add to save the VPN profile.
    • Open the newly created VPN profile and click on the Copy VPN profile button in the top right corner
    • You only need to change two values – the profile name and the Local ID
    • For the profile name we will use vpn_profile_ipad
    • For the Local ID we will change the value to %custom2% as this is the custom variable we are using for our setup to authenticate the iPad
    • All other settings will remain the same.
    • Click on Save to save to copied profile
    • The two newly created VPN profiles should look like the below screenshot
  5. Assign the user credential profiles to the user
    • To make easier user of the user credential profiles, I have created two user groups in BlackBerry UEM – one for iPhone users, one for iPad users
    • The user credential profiles we created, are assigned to the respective group as shown in the below screenshot, e.g., the iPhone user credential profile is assigned to the iPhone user group and the iPad user credential profile is assigned to the iPad user group
    • Our test user is member of both groups
    • We are now have the option to add the two certificates to the user
    • In our setup we have two VPN user certificates – one issued to vpn001@boui.de for the iPhone and the other issued to vpn002@boui.de to be used with the iPad. We will add the certificates to user by click on Add a certificate. We will be prompted for the password of the private key when we upload it to the UEM server. Make sure you have the relevant passwords at hand when adding the certificates. After the certificates were successfully added, the view should be like the screenshot shown below


Our VPN setup in BlackBerry UEM is now completed. As we are differentiating between iPads and iPhones, I would recommend doing the app assignment, to use per App VPN, and mail profile, for the per Account VPN, through device groups. If you are planning to use per Account VPN in the email profile, you will require one mail profile per device type. For a simple setup, set the device query in the device group to Model Starts with iPhone and scope the device group to the iPhone users’ group. For the iPad group change the value to Model Starts with iPad and modify the user groups scope to the iPad users. When assigning the apps to the device groups, make sure to use the correct VPN profile.

The screenshot below shows the device group setup for iPhone and configured with an email profile and the app SecuFOX to use the per App VPN tunnel. The per Account VPN configuration for the email profile is not shown in the screenshot. You can add additional profiles and apps to the device group as required.

iPhone season is getting closer

In a few weeks’ time Apple will launch new iPhones and a new OS version: iOS 18. We should also see an iPadOS 18 update. As usual, many users will immediately jump onto the new iOS version as soon as it is available to the public. If you are an organisation that issues iPhones and iPads to their end users through Apple Business Manager and an MDM solution, I would recommend to not immediately do the upgrade to the new iOS version. Through your MDM solution Apple allows you to delay the update on supervised devices for up to 90 days. This gives you ample time to test all your business applications and confirm that they work properly with iOS 18 and iPadOS 18. When the tests are finished successfully, your users can safely do the upgrade to iOS 18 and iPadOS 18. And you can rest assured that you will not be flooded with support requests related to the upgrade.

My recommendation is to delay the updates for 30 days and then go through your test plan. Should you encounter issues during the testing that need to be addressed by Apple, your MDM supplier or any 3rd party app developer, you can easily extend the 30 days as required and work on having the issues resolved.

With BlackBerry UEM delaying the software updates is easy and simple. All you need to do is modify the IT policy assigned to your users or their devices and enable “Delay software updates (supervised)” and set a value for “Software update delay period (supervised only)”. The screenshot below shows an “IT Policy” with the delay enabled for 30 days. Other MDM solutions usually give you similar options to configure the software update delay. Good luck with your testing!

Requirements for Apple software updates

Most of my customers who are issuing smartphones and tablets to their employees, usually give their users iPhones and iPads. As I have outlined in my previous post, a big challenge is to keep these devices up to date. I often get asked which requirements need to be met for the OS software updates to be done automatically or manually by the user. Until recently, there was not much public information from Apple on this topic for iOS and iPadOS devices. This support article was recently updated by Apple and now includes helpful details on the criteria that need to be met for the iOS updates to work, e.g. network requirements and power requirements. For a user-initiated update, the device needs to have a battery percentage of at least 20%. Rapid Security Response updates can be installed while the battery percentage is at 5% and the device is connected to power. If you are managing iPhones and iPads, I recommend you to read the support article. Previously most of the information was only available on Apple’s AppleSeed portal and covered under NDA.

USB-Sticks ans iPhone und iPad anschließen

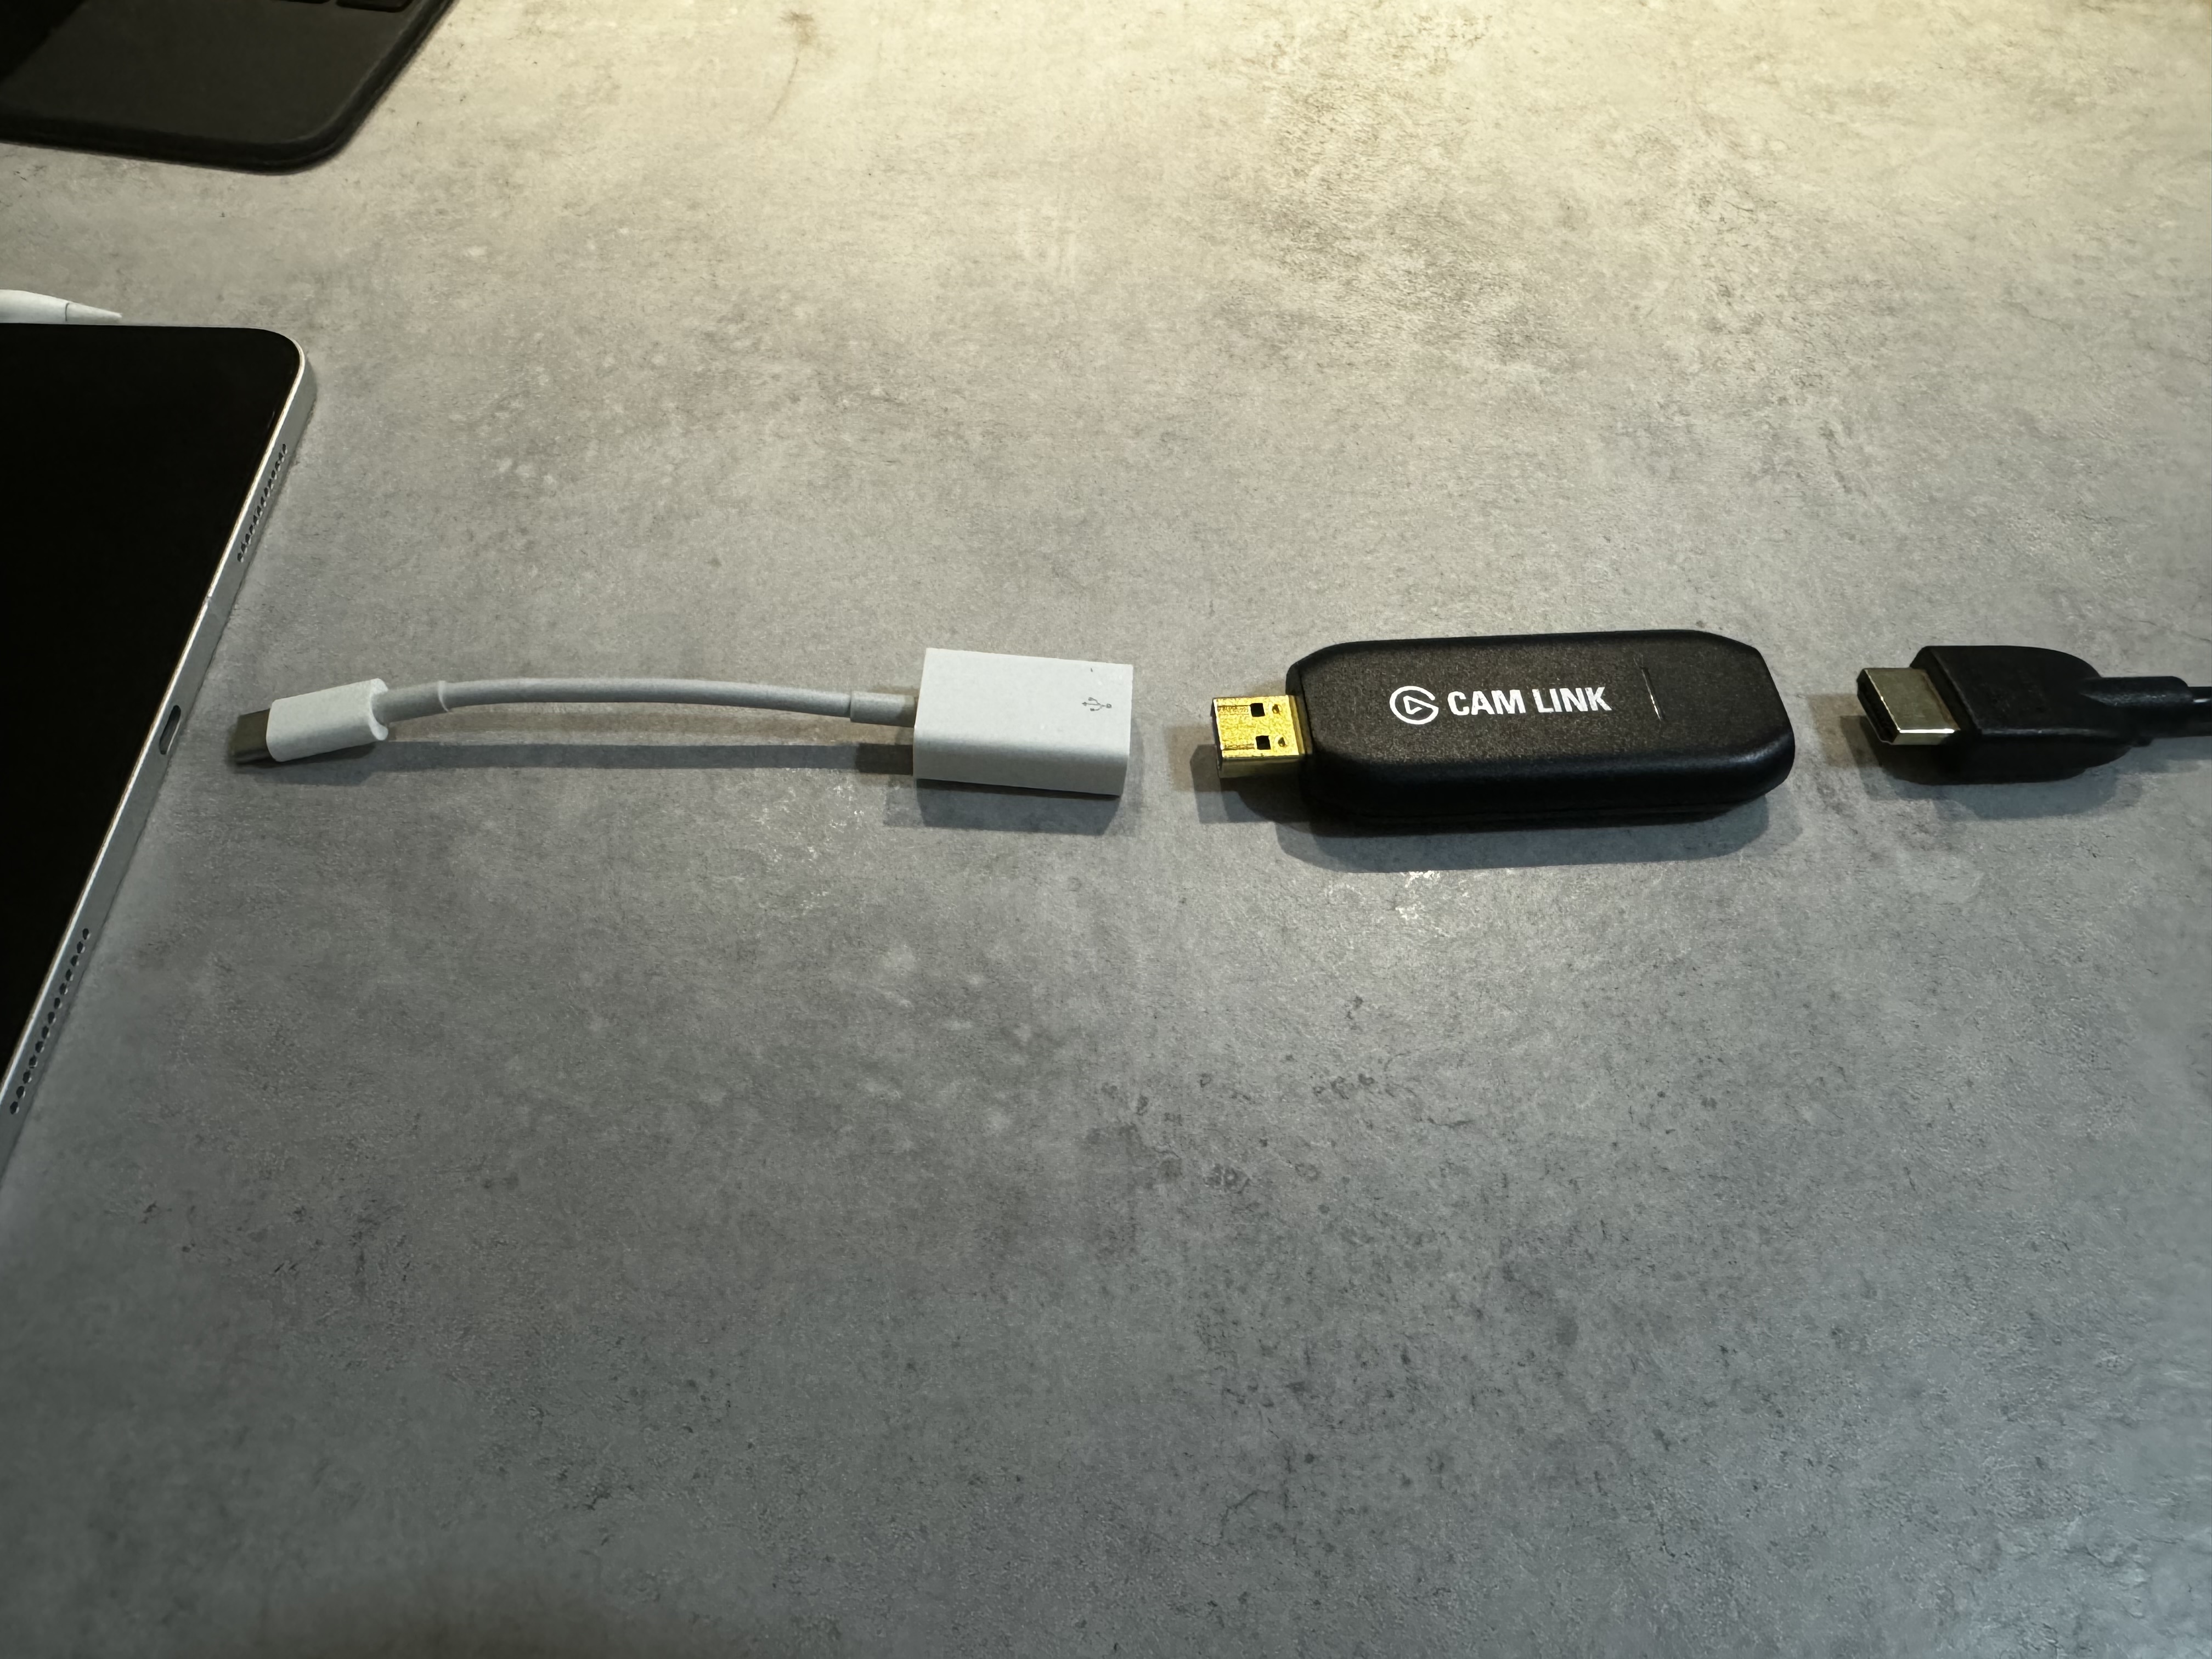
Die App „Dateien“ auf dem iPad und iPhone hat ein praktisches Feature, das gerne übersehen wird: Man kann USB-Sticks anschließen und auf die dort liegenden Dateien direkt zugreifen. Ganz praktisch ist das auf iPhones und iPads mit USB-C-Port. Dort benötigt man keine weiteren Adapter. Es reicht ein Stick mit USB C-Stecker. Bei Geräten mit Lightning-Port benötigt man Apples Lightning auf USB 3 Kamera-Adapter. Je nach USB-Stick muss man bei dem Kamera-Adapter ein Netzteil einstecken. Das iPhone bzw. iPhone weisen darauf hin, falls das notwendig ist. Laut Apple werden folgende Dateisysteme auf den USB-Sticks unterstützt: “APFS, APFS (verschlüsselt), macOS Extendet (HFS+) exFAT (FAT64) oder FAT”. So lassen sich einfach auch größere Dateien von und zum iPhone oder iPad übertragen. Dies funktioniert auch mit externen SSDs bzw. Festplatten und SD-Karten. Verfügbar ist diese Funktion für Geräte ab iOS 13 und iPadOS 13.

Apple indigo hat BSI-Zulassung erhalten

Im Oktober 2022 hat das Bundesamt für Sicherheit in der Informationstechnik (BSI) die Sicherheitseigenschaften von Apple iOS und iPadOS bestätigt. Die Zertifizierung läuft unter dem Namen indigo (iOS native devices in government operation). Apple indigo ermöglicht die sichere und native Nutzung von iPhones und iPads im behördlichen Umfeld und ist für die Nutzung bis hin zur Klassifizierungsstufe “Verschlusssache – nur für den dienstlichen Gebrauch” (VS-NfD) zugelassen. Knapp 20 Monate nach der Pressemeldung des BSI hat Apple indigo am 18. Juni 2024 eine Zulassung erhalten. Damit hat Apple einen wichtigen Meilenstein für den Einsatz von iPhones und iPads in deutschen Bundesbehörden erreicht. 

Neben den erlaubten iPhone- bzw. iPad-Modellen und einer der zugelassenen VPN-Lösungen benötigt man für Apple indigo ein passendes Mobile Device Management (MDM). Das MDM kann entweder im Brightsite- oder Darksite-Modus betrieben werden. Aktuell gibt es noch kein für den sogenannten Brightsite-Einsatz zertifiziertes MDM. Es befinden sich zwei Anbieter im Zertifizierungsprozess. Diese MDM-Lösungen können vor Abschluss des Zertifizierungsprozesses zur Verwaltung der Apple indigo Endgeräte verwendet werden. Für das Darksite-Setup, das für indigo eher selten zum Einsatz kommt, wird keine BSI-Zertifizierung benötigt. Für die Brightsite-MDMs wird die Zertifizierung benötigt. Mit meinem Arbeitgeber sind wir im BSI-Zertifizierungsprozess für unsere MDM-Lösung BlackBerry UEM. Das Apple indigo Ökosystem kann um zugelassene Apps erweitert werden. Die Apps sind dann notwendig, wenn man Nutzungsszenarien hat, die nicht von den zugelassenen Apple Apps Kalender, Kontakte & Mail abgedeckt sind. Im Kontext von Apple indigo darf z.B. Safari nicht auf dienstliche Ressourcen zugreifen. Das macht den Einsatz von Drittanbieter-Webbrowsern notwendig. Zurzeit gibt es zwei zugelassene Webbrowser. Einer dieser Browser ist SecuFox von Secusmart.

Wer sich zum Thema Apple indigo und kompatiblem MDM austauschen möchte, kann mich gerne kontaktieren. Im Kontext von Apple indigo habe ich schon einige Proof of Concepts mit unserer Lösung zur Verwaltung mobiler Endgeräte, BlackBerry UEM, umgesetzt.

Apple Business Manager: Disable Activation Lock

Organizations providing iPhones and iPads to employees can sometimes encounter a hurdle: returned devices with Activation Lock still enabled. This prevents assigning the device to a new user. Disabling Activation Lock can be inconvenient, especially if:

  • The device is locked with a personal Apple Account (not the company account).
  • The device wasn’t enrolled in a Mobile Device Management (MDM) solution.

Solutions based on MDM enrollment

  • Supervised MDM devices: If the device was enrolled in an MDM as a supervised device, your MDM solution likely offers a bypass code to remove Activation Lock.
  • Contacting Apple (limited success): You can also contact Apple, proving ownership and purchase of the device. However, this method isn’t foolproof.

Simplified removal with Apple Business Manager

Fortunately, Apple has streamlined Activation Lock removal for organizations using Apple Business Manager. Now, you can disable Activation Lock even on devices not enrolled in MDM, as long as they are registered with Apple Business Manager. In the Apple Business Manager device view you now have the option to select “Turn Off Activation Lock”. As far as I am aware, the feature was turned on today for my Apple Business Manager account. I know plenty of my customers who will be very happy about this feature. Turning off activation lock will work for all device types enrolled in Apple Business Manager, including Macs, iPod Touch devices and Apple Watch. All users in Apple Business Manager with a role that has Manage Device privileges can turn Activation Lock off.

The things iPad needs to be considered Pro

Jason Snell (Upgrade, Six Colors) and Federico Viticci (MacStories) love the iPad. In this segment from their review of the new iPad Pro in Upgrade Podcast 512, they break down exactly where iPadOS is holding the new hardware back.

This is the story that Federico wrote, and which reads like a complete backlog for iPadOS development. Of course, Federico wanted to write a review, but Apple could not spare a review unit for him.

Ein iPad ist ein iPad ist ein iPad

Solche Umfragen werden meistens ab etwa 50 Teilnehmern stabil. Hier bestätigt sich meine Annahme, dass nur wenige (Create Music, Create Video) mehr als einen “einfachen” iPad benötigen. Wir haben im März einen angeschafft und der hat sich allerbestens bewährt. Erfreulicherweise war er dank sattem Rabatt bereits günstiger als der von Apple gestern gesenkte Preis. Allerdings haben wir den frechen Aufpreis für den Speicherausbau von 64 auf 256 GB bezahlt. Und das auch nur, weil man später nicht nachrüsten kann.

Wie seht Ihr das? Muss es ein iPad Air oder iPad Pro sein?

No big surprises at Apple event

The Apple event went as predicted by leaks.

  • New iPad Pro M4 11″ and 13″ Ultra Retina XDR, a dual-layered OLED screen
  • New iPad Air M2 11″ and 13″ Liquid Retina display
  • New iPad Air and iPad Pro now have the camera at the long side, just like the iPad 10
  • New Pencil Pro (149 €) for iPad Air M2 and iPad Pro M4 with squeeze and rotation gestures and haptic feedback
  • iPad 10 gets a lower entry price. iPad 9 is gone.
  • iPad mini was just a nod at the end of the event without any news
  • New Magic Keyboards for iPad Pro M4 only

In software news Logic Pro and Final Cut Pro get upgraded with stunning new features. Final Cut Camera sherlocks RecNGo.

iPad 10 – Erste Eindrücke

Ja, richtig. Ich habe zum ersten Mal das iPad der zehnten Generation benutzt, das 2022 neu vorgestellt wurde. 😉

  • Erster Eindruck: Mehr iPad braucht kein Mensch. Wir suchten ein Gerät für eine 87-Jährige, die aktuell ein zehn Jahre altes iPad nutzte und damit gut zurechtkommt.
  • Zweiter Eindruck: Verglichen mit den (viel teureren Pro-Geräten) ist der Rand größer. Das ist ein Vorteil, weil man nicht so leicht unbeabsichtigt auf das Display greift.
  • Dritter Eindruck: Der Fingerabdrucksensor funktioniert gar nicht. Das hat mehrere Ursachen. Die wichtigste ist, das mit zunehmendem Alter die Fingerabdrücke nicht mehr so ausgeprägt sind.

Ich hatte die Befürchtung, dass der Wegfall der Hometaste problematisch wird, weil die Bedienung anders funktioniert. Das hat sich jedoch als unbegründet herausgestellt. Die Wischgeste kennt sie schon vom Schließen von Programmen.

Ich war jedoch überrascht, welche Probleme die Einschalttaste macht. Man zähle nur mal die Funktionen auf: Einschlafen, Aufwachen, Entsperren, Ausschalten, Einschalten, Siri. Eine Taste, viele Funktionen. Finger nur auflegen, drücken, drücken und ohne Druck drauflassen, drücken und halten – das ist die totale Überforderung. Wie könnte man das lösen? Drücken und dann fragen, “was willst du machen?”

Was machen alte Menschen, wenn man ihnen auf dem Sperrbildschirm “TouchID” anzeigt? Sie legen den Finger an diese Stelle. Nicht auf den darüberliegenden Knopf. Wie macht man es richtig? So wie Android mit Fingerabdruckleser unter dem Display. Hier legt man den Finger hin, wo das Display sagt, dass man ihn hinlegen soll.

iPad 10 gibt es gerade zu einem Knallerpreis, vermutlich weil alle auf Apple warten. Wer auf lange Sicht plant, nimmt die Version mit 256 GB. #reklame